Cracked Skid Board and More Stripped Screw Holes

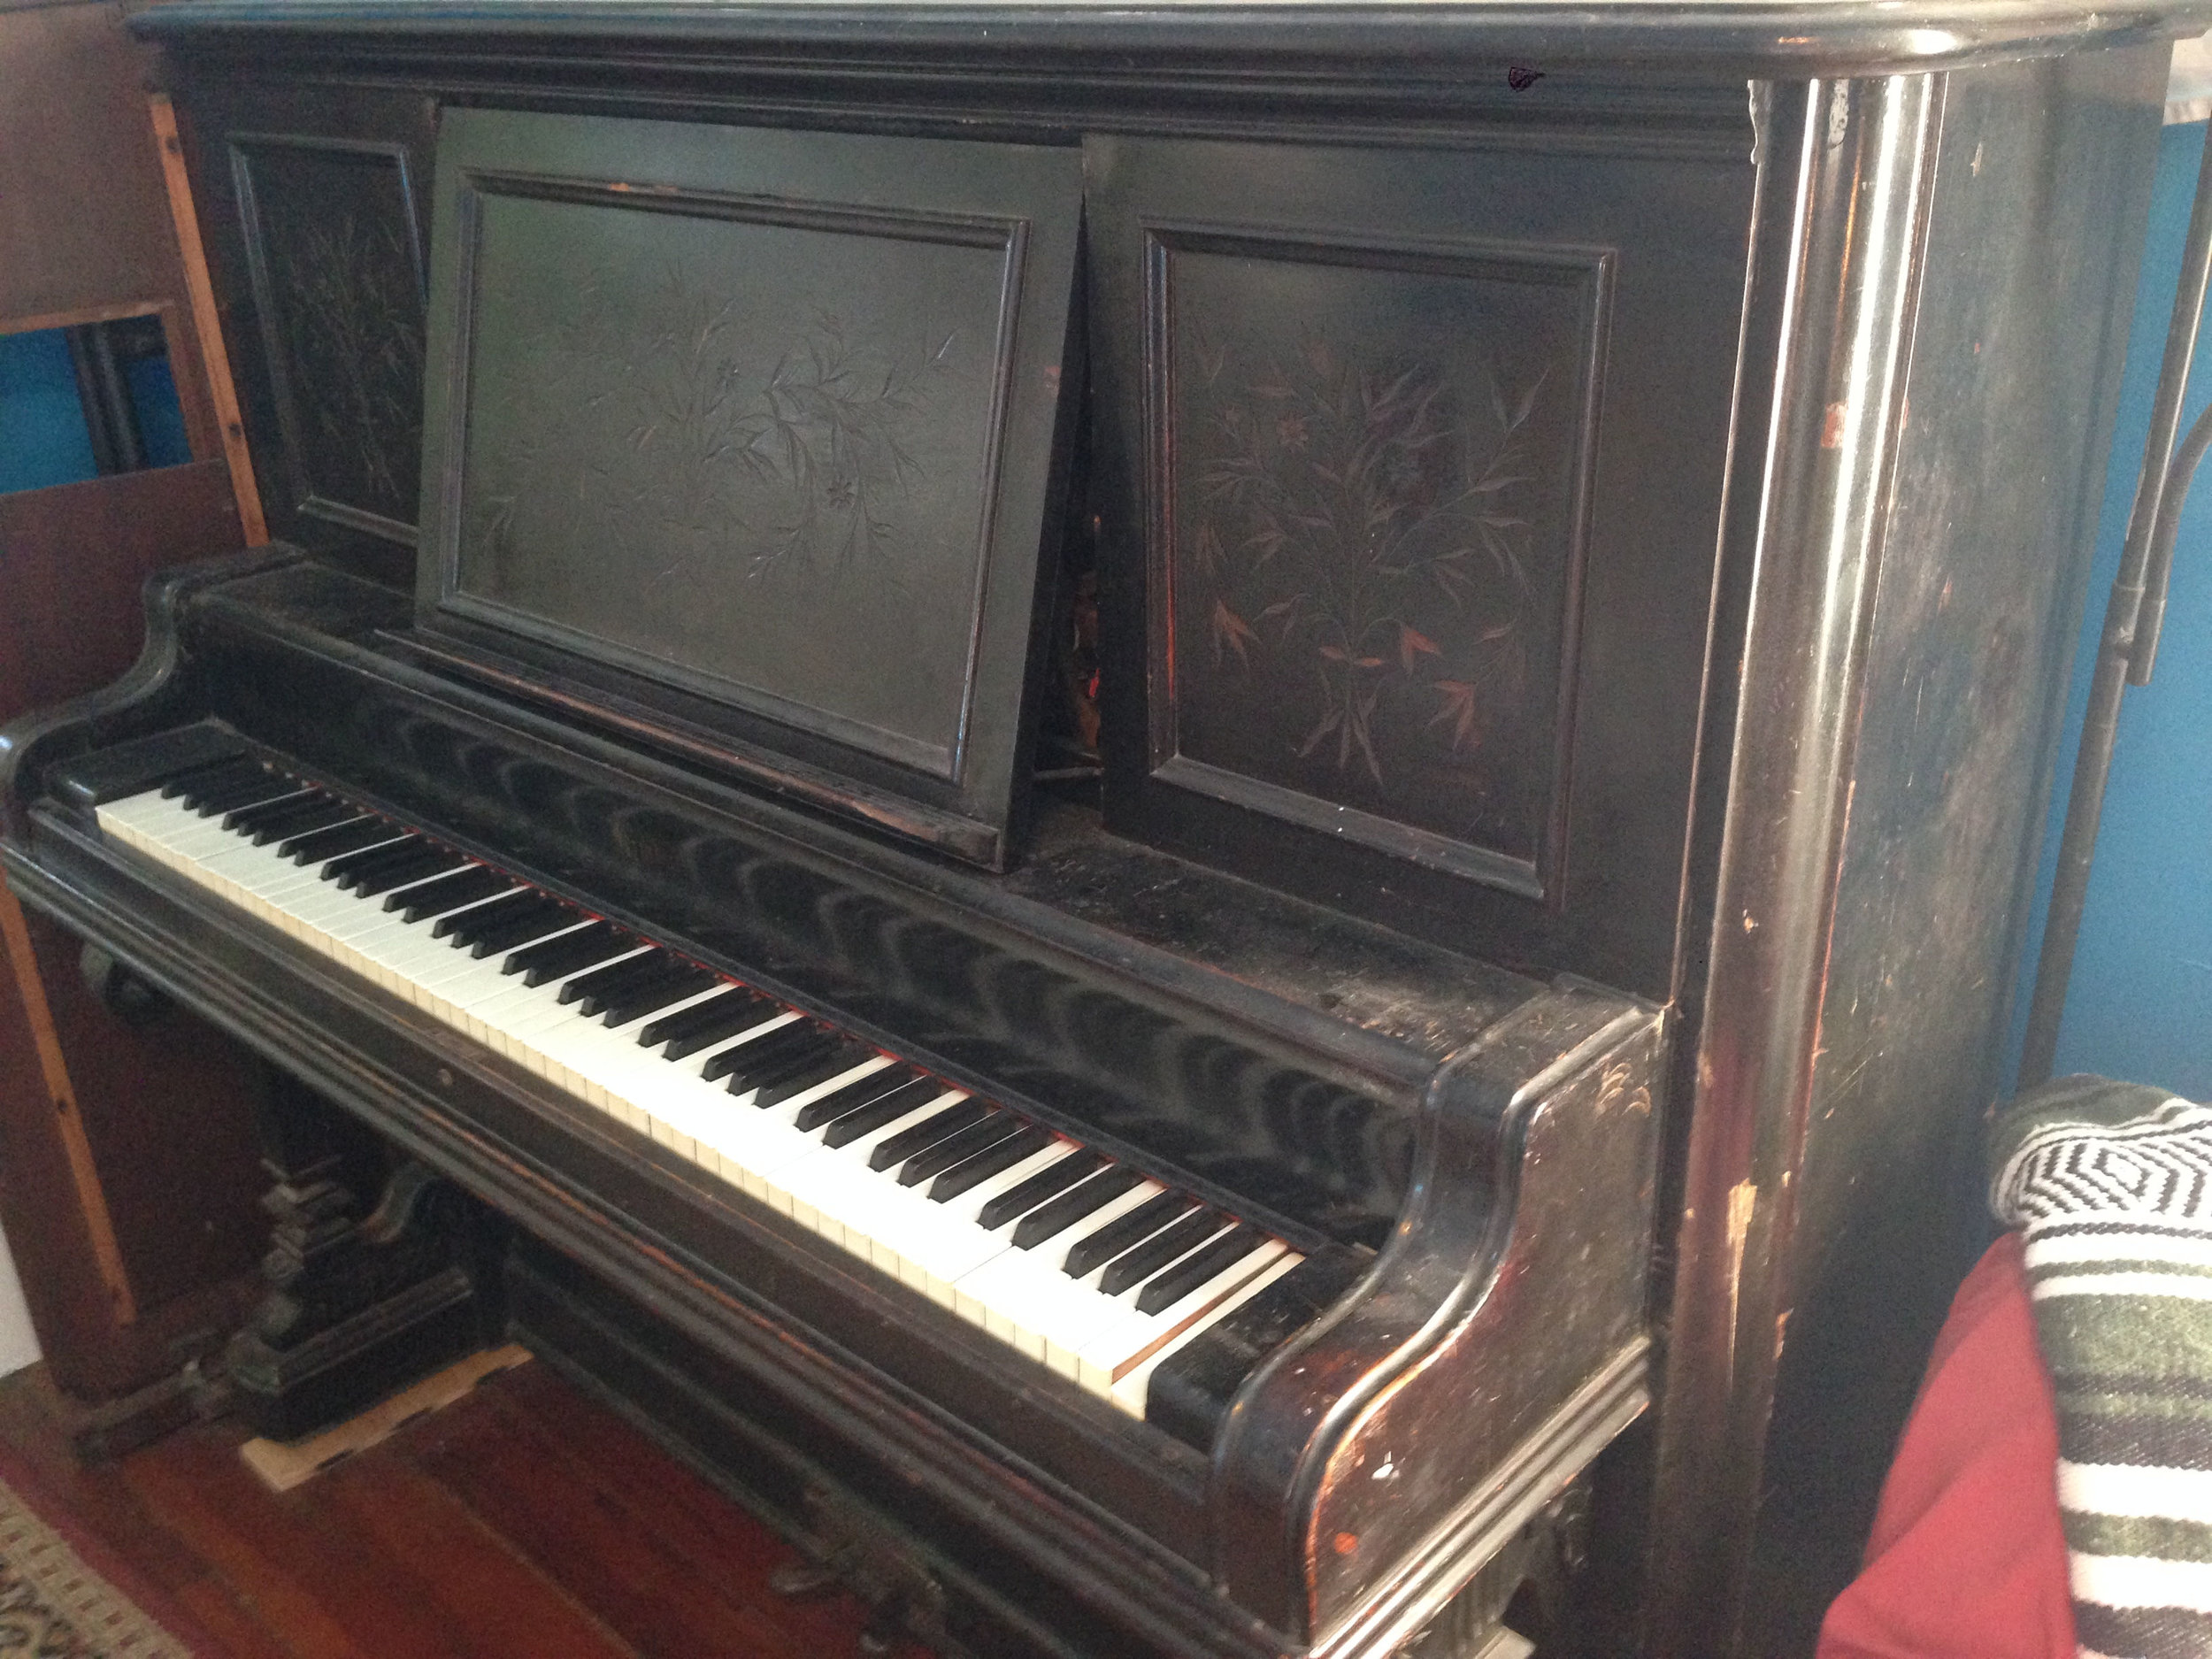
This post is a continuation of the Milton Player Piano Series.

This time, I'll be repairing the skid board, which is the plank that makes up the bottom of the piano. The pedals, pedal rods, and blocks that the bellows mount to are all attached to the skid board.  

As you can see in the next few pictures, there are several large cracks running the length of the skid board.  This has caused the skid board to sag, which in turn prevents the pedals from working properly.  Also, most of the screw holes in the skid board are stripped out.  This prevents the pedal components from being firmly attached.

Before repairing the skid board, I remove all of the hardware that is attached to it.  There are a lot of pieces to keep track of here, so I number the bottom of each piece I remove, as well as draw a simple diagram to help with the reassembly later.

In order to make gluing and clamping the skid board easier, I use my Roll-Or-Kari Piano Moving Handtrucks to easily lift the piano an extra few inches off the ground.

The next step in repairing the cracks is to spread them slightly by tapping in a couple of wedges.  This will make it easier to get the glue all the way through.  Once the crack is opened up, I brush in some Titebond II, trying to get it all the way to the bottom of it along its whole length.

To clamp the skid board, I use these 3/4"  threaded pipe clamps along the underside of the piano.  After clamping, wipe off any excess glue with a damp rag.  Allow this to dry for 24 hours.

After the glue has dried, I attach these mending plates just for extra security against the crack re-opening in the future.  Any irregularities in the top of the skid board can also be smoothed out with a small block plane.

Now that the cracks have been repaired, I can move on to fixing the stripped screw holes.  The first thing to do here is to draw a large x through the center of each hole to be repaired.  This will assist in redrilling the holes in the exact same location later on.

After the X's have been drawn, I enlarge each hole with a 3/8" Forstner bit to about a centimeter deep.  I then proceed to glue a 3/8" plug into each hole, making sure to align the grain of the plug with the grain of the skid board.

This repair must be performed using plugs, not with dowel pins as the grain of a dowel pin runs the wrong direction.

Once the glue has dried on these plugs, the last steps are to extend the X's that I drew previously onto the plugs, make a dent precisely in the center with a sharpened punch, and predrill each hole with a bit that is the same size or slightly larger than the shaft of the corresponding screw.

After each plug has been predrilled, the pedals and pedal hardware can be reinstalled.

Recent Blog Posts


See more of my blog posts here

Hello There! Don't Leave Just Yet!

I provide piano repair information on my blog and through email correspondence free of charge because I like to help people learn about pianos. However, it does take up a significant amount of my time. So, if you are so inclined, you can click the button below to help supply my caffeine habit and show your appreciation for my work. Thank you!

Buy me a matcha latteBuy me a matcha latte

Or Send Bitcoin! bc1q4tz3qzp6a6zeduqema3v6s0vnrhst4zwy4wtp9

Bridle Strap Replacement

One of the most common repairs I run into is that of broken bridle straps.  These straps are made of a thin cloth that becomes dry rotted over time and are usually the first things to go bad in a piano.  Broken bridle straps can also serve as a good warning sign that other problems might soon arise in the piano action.  Luckily, replacing bridle straps is one of the quickest and easiest repairs you will run into.

The bridle straps have a cork end that is pushed into a hole in the catcher which is attached to the hammer butt.  The other end of the strap is slipped over a wire that is attached to the whippen  (the whippen transfers force from the key to the hammer, as well as to the dampers).  The purpose of the bridle strap is make removing and reinstalling the piano action easier.  The straps keep the whippens  from hanging down loosely which can cause them to catch on the key capstans and break when the action is put back in the piano.  The straps can also help the hammers return to rest in a poorly regulated or sluggish action.

web100_2558.JPG

The cork end of the broken straps can easily be popped out of the catcher with a simple tool made from a bicycle spoke or other thick wire..

New bridle straps, as well as the tool to insert them, can be purchased from any piano supply warehouse such as Schaff (also known as Vanda King) or Pianotek.  They are only sold by the set, not individually.  This is usually fine because they are cheap and it is a good idea to have extras on hand.

The cork tips stick onto the end of the tool which can then be pushed into the hole in the catcher.

The other end can then be hooked onto the wire coming out of the whippen, and that's all there is to it.

Recent Blog Posts


See more of my blog posts here

Hello There! Don't Leave Just Yet!

I provide piano repair information on my blog and through email correspondence free of charge because I like to help people learn about pianos. However, it does take up a significant amount of my time. So, if you are so inclined, you can click the button below to help supply my caffeine habit and show your appreciation for my work. Thank you!

Buy me a matcha latteBuy me a matcha latte

Or Send Bitcoin! bc1q4tz3qzp6a6zeduqema3v6s0vnrhst4zwy4wtp9

The Best and Worst Places to Keep a Piano in Your Home

This is some great information about how the placement of a piano in your home can greatly affect its longevity.  This was originally posted by Bol Pianos Africa.


The Best Place In Your Home To Put Your Piano
In order to decide the best place to position your piano, you first need to know where NOT to put it. 
Climate and environment
It’s very important to achieve a constant temperature. Pianos don’t like being in a room that constantly changes temperature (cold at night, hot during the day etc.).
Try your best to keep your piano in a room that has the heating on the low side during the winter and is also not too hot and sticky in the summer.
A constant temperature of around 20 centigrade (65-70 Fahrenheit) and a humidity level of between 45 and 60 percent are ideal. The easiest way to keep an eye on this is to buy a humidifier gauge and stick it on the wall.
Central heating systems
A piano’s number one enemy!
When your heating is off during the night, the humidity rises; when it’s switched back on in the morning, the humidity drops. These changes in humidity cause the wood to expand and shrink, causing your piano to go out of tune. Over a long period of time, problems such as loose tuning pins, cracked soundboards, split bridges, wobbly hammers and loose keys can occur.
Central heating can cause the soundboard to crack. Cracked soundboards encourage buzzing noises to appear and in extreme cases, can completely deaden the sound of your piano.
Central heating can dry out the wrest plank. If this happens, the tuning pins that hold the high tension of the strings start to loosen. This results in your piano not being able to stay in tune.
Keep your piano away from heat sources
Keep your piano as far away from radiators or electric heaters as possible.
Never put your piano in a room that has under-floor heating! This will completely ruin your piano VERY quickly. If your whole house is fitted with under floor heating then all you can do is place a heavy rug underneath it. This will provide some protection for your piano.
Sunshine is very nice, but pianos don’t really care much for a tan!
Direct sunshine coming through a window can be a big problem for your piano…
Apart from disturbing the humidity level in your piano, direct sunshine is the cause of another serious issue - fading.
If your piano is under direct sunlight – even for a few days – the wood will start to fade.
A high gloss polyester finish can be completely ruined if left under direct sunlight for too long. Sunshine will also knock your piano out of tune.
Solution – keep your piano away from windows that let sunlight through, or place a heavy cover over your piano to protect it.
Kitchens are a threat
If you have an open floor plan (kitchen and living room together) you must keep your piano as far away from your kitchen as possible. The steam from cooking gets absorbed in the piano’s wood, resulting in an extreme level of humidity. This will cause many problems for your piano including: sluggish and sticking keys, slow hammers and dampers, swelling key lead and expanding felts. This excessive humidity can even cause tuning pins, bridge pins and strings to rust.
If, despite your best efforts to keep your piano away from harm. you still find you’ve got a problem, ask your piano tuner to fit a humidity control system inside your piano. This regulates the moisture content inside the piano.
Drafts
Pianos don’t get on well with drafts either.
If your piano is next to a window or an outside door, watch out! You’ll find that keys will start sticking, dampers will stop working and many other small annoyances will interfere with your piano’s performance. If you have double-glazed windows, this will reduce the problem.
Which room is best to put your piano?
For those of you lucky enough to have a purpose built music room, great.
Otherwise…
Your dining room is probably the next best place to keep your piano. Dining rooms tend to keep a more constant humidity level and have a lower temperature than other rooms in the house.
To summarise:
Where NOT to put your piano:
• Next to a window that lets in sunlight or drafts
• Next to an outside door
• Next to, or in front of a radiator or other heat source
• In a room with under floor heating
• Next to an open kitchen
• Next to, or underneath an air conditioning unit
• In a garage, shed or conservatory

Recent Blog Posts


See more of my blog posts here

Hello There! Don't Leave Just Yet!

I provide piano repair information on my blog and through email correspondence free of charge because I like to help people learn about pianos. However, it does take up a significant amount of my time. So, if you are so inclined, you can click the button below to help supply my caffeine habit and show your appreciation for my work. Thank you!

Buy me a matcha latteBuy me a matcha latte

Or Send Bitcoin! bc1q4tz3qzp6a6zeduqema3v6s0vnrhst4zwy4wtp9

Let Off Rail Repair a.k.a. How to Remove Broken Screws from Wood

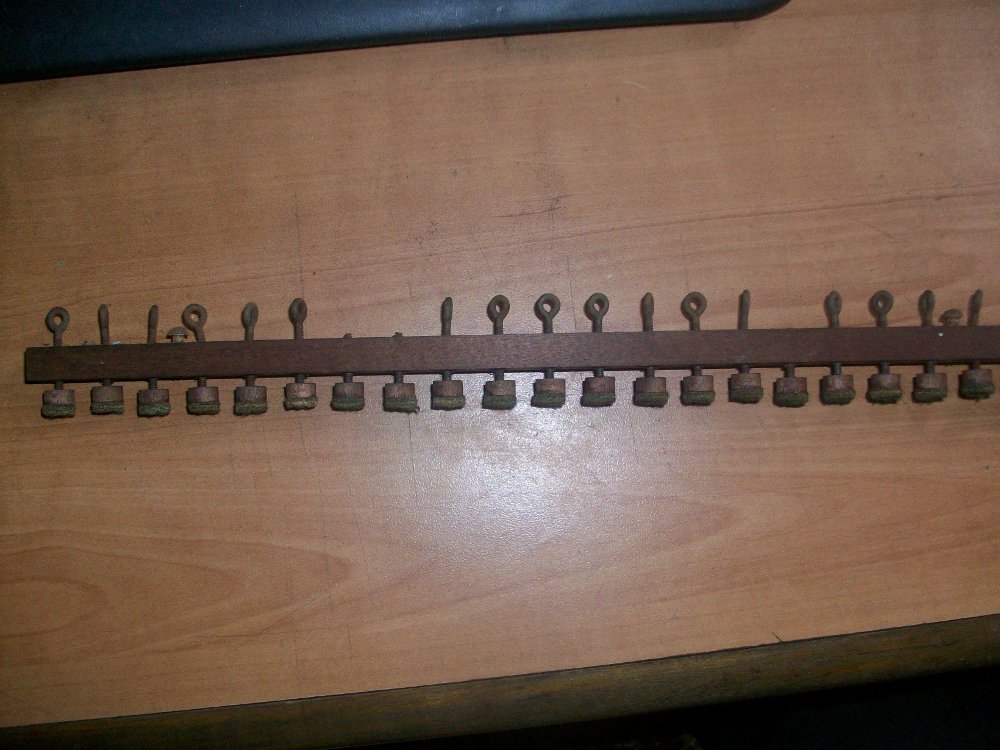
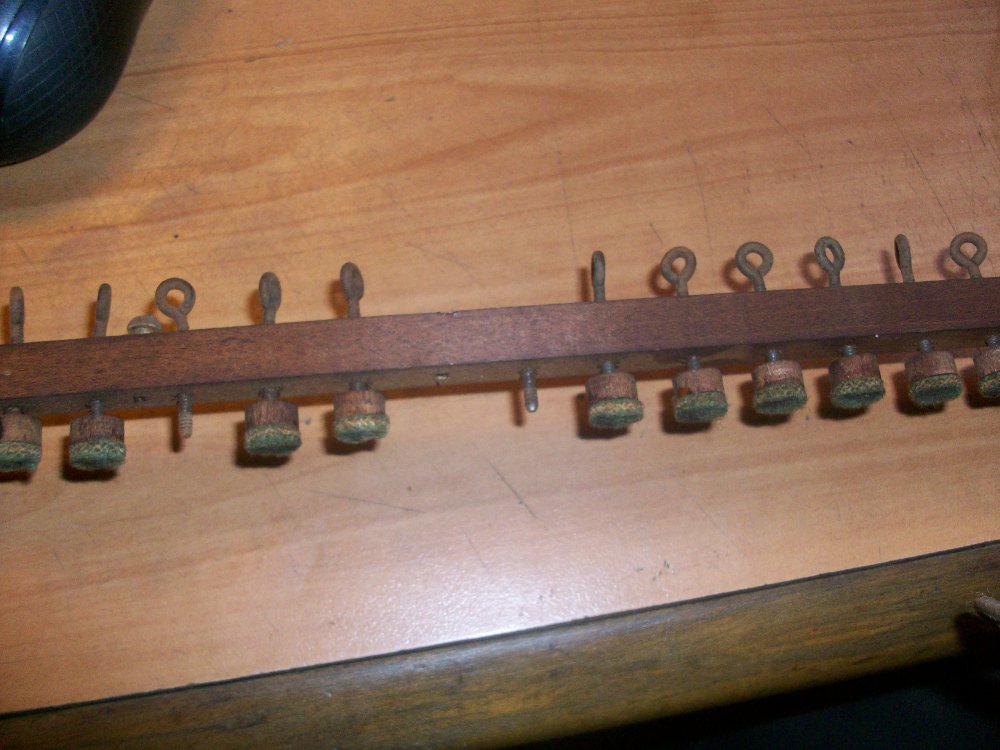
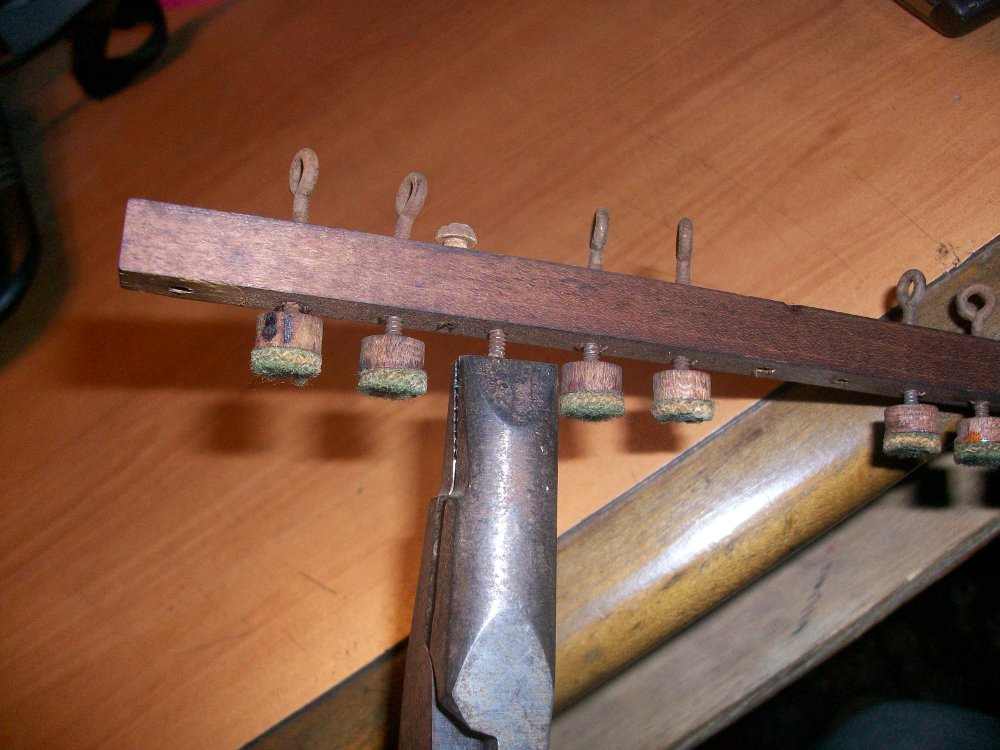
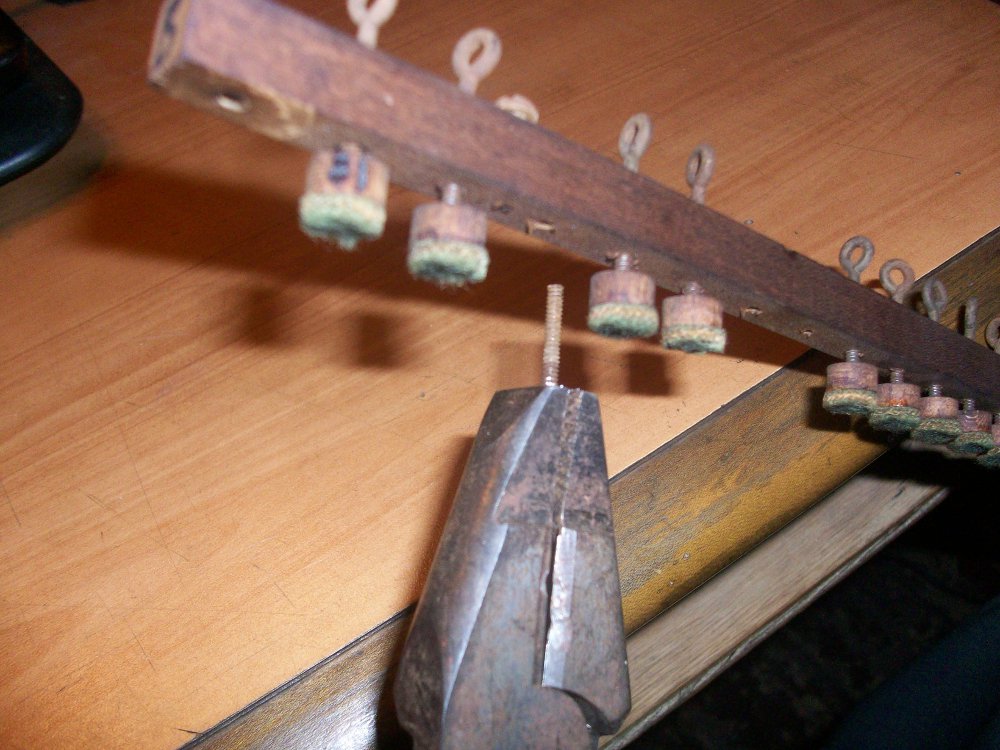
Here's another post in the Milton Player Piano series.  I attempted to adjust the hammer let off by turning these regulating screws, but, instead of turning, the tops of the screws just snapped off.  I think this was caused by several factors.  One, I think that the screws are simply made of a weak metal.  Perhaps it was never hardened, or it is just a poor alloy.  Either way, it breaks way too easily.  Two, either the rust on the screws or a swelling of the wood has caused the screws to bind in their threaded holes.  So, I've decided to remove all of these regulating screws and let off buttons and replace them with new ones.

A few broken and bent regulating screws

A few broken and bent regulating screws

rail initial2

After removing the let off buttons from the screws (I just break them off with a pliers since I'm going to replace them anyway), use a soldering iron to heat up the end of the screw. Keep the tip in contact with the screw for at least 30 seconds.  This heating of the screw will loosen the bond that the screw and the wood have formed and hopefully allow us to twist the remaining piece of the screw out of the wood.

Breaking the wooden buttons off of the screws. These will be replaced with new buttons later.

Breaking the wooden buttons off of the screws. These will be replaced with new buttons later.

Heating the screw with a soldering iron

Heating the screw with a soldering iron

Grab the screw firmly with a set of linesman's pliers or a vice grip, and gently rotate it left and right to try to loosen it.  You should be able to feel the screw "click" back and forth while you are turning it.  If you try to just unscrew it straight away, you will likely break the screw.  Once the screw has loosened significantly from the back and forth motion, unscrew it all the way to remove it from the wood.

If the soldering iron doesn't do the job, you may have to get the screw even hotter by very carefully using a propane torch or similar tool.  Only use this on screws that have enough material sticking out of the wood to allow you to keep the flame from igniting the wood (it may scorch a bit, which is fine).  If the screw is broken off on both sides of the wood rail, do not use a flame.

pliers
broken screw removed

After the broken screws have been removed, go through and heat all of the remaining screws in the rail for at least 30 seconds with the soldering iron.  Then, use a drill with a quick-change adapter on low speed to remove the screws.  I like to leave every third screw so that when I am installing the new screws I can turn them in to the same depth as the old screws to minimize the amount of adjusting I'll have to do later.  It is always good to leave an original as a reference when replacing these kinds of things.

Removing the screws with a cordless drill

Removing the screws with a cordless drill

Every third screw is left in the rail

Every third screw is left in the rail

The next picture shows some of the scorching that I was talking about from the propane torch, as well as one screw which ended up breaking off on both sides of the wooden rail.  This screw is no longer removable with the previous method and calls for more drastic measures.

Screw broken off on both sides of the rail

Screw broken off on both sides of the rail

Drilling two holes next to the screw

Drilling two holes next to the screw

The idea with this repair is to drill a couple small holes adjacent to the broken screw, pry the screw into the new hole, pull it out, and then plug and redrill the original hole.  All of the drilling for this process should be done on a drill press to ensure the holes are perfectly perpendicular to the rail.

After the holes are drilled, push the broken screw into the new space with a screwdriver.  Once the screw is there, it can be removed with a tweezers or with a small punch.

Holes drilled next to the screw

Holes drilled next to the screw

The screw has been pushed into the hole

The screw has been pushed into the hole

The broken screw has been removed

The broken screw has been removed

Now that the screw has been removed, the threaded hole must be repaired so that I can thread a new regulating screw in.  I will be using a method described in Mario Igrec's "Pianos Inside Out".  The method is to drill a hole perpendicular to the original hole and plug it with a hardwood dowel pin.  The reason for drilling the hole perpendicular and not just straight though the original hole is that the grain of the dowel pins runs along their length, and the repair will be less likely to split if the dowel is put in perpendicularly.   I used 1/4" dowel pins for this repair.

Drilling a 1/4" hole perpendicularly through the rail

Drilling a 1/4" hole perpendicularly through the rail

The 1/4" hole and dowewl pin

The 1/4" hole and dowewl pin

Once the hole has been drilled, coat a 1/4" dowel pin with wood glue and tap it into the rail with a rubber mallet.  If the pin is very tight, you may need to hold the rail over an open vise or something similar that will support on both sides of the pin, but not directly under it.  This will allow you to safely tap the pin through until it extends out the other side of the rail.

dowel peg2
dowel pin2

Once the glue has dried, I use a fine-toothed pullsaw to cut the pin flush with the rail.

Cutting off the excess

Cutting off the excess

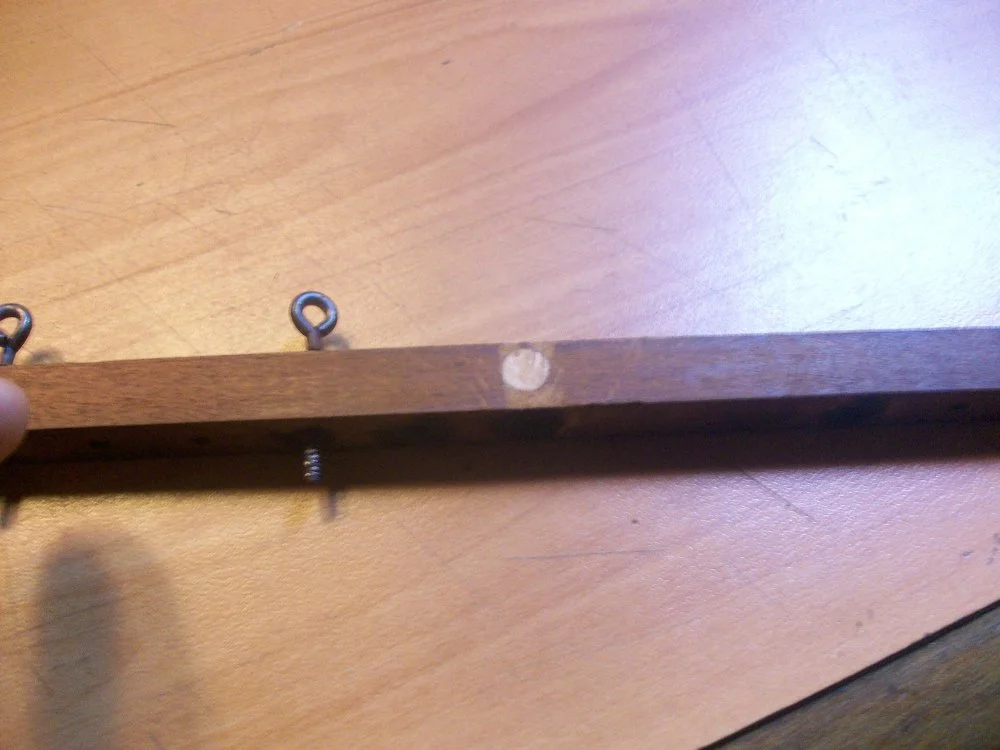
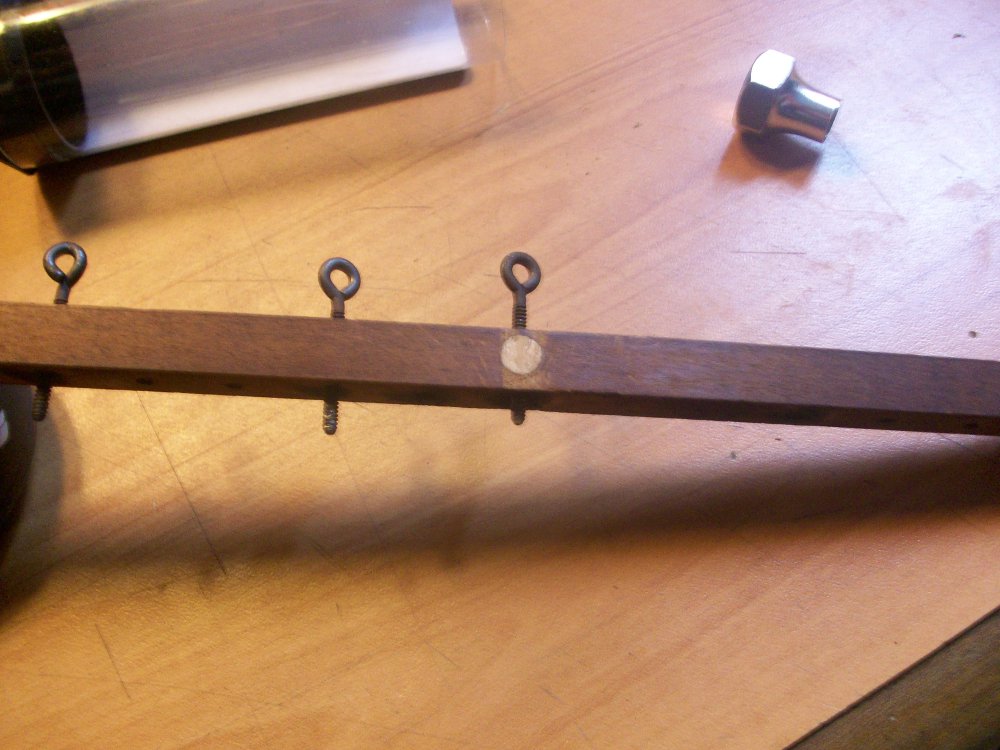
The resulting repair

The resulting repair

The final part of this repair is to predrill the pin where the original screw was.  The drill bit should be as thick as the  body of the screw so that the screw goes in easily and the threads still have enough material to grab onto.

Predrilling the screw hole

Predrilling the screw hole

A screw threaded through the new hole

A screw threaded through the new hole

At this point, all of the screws have been loosened or removed and the rail is ready for the new regulating screws and buttons.

Recent Blog Posts


See more of my blog posts here

Hello There! Don't Leave Just Yet!

I provide piano repair information on my blog and through email correspondence free of charge because I like to help people learn about pianos. However, it does take up a significant amount of my time. So, if you are so inclined, you can click the button below to help supply my caffeine habit and show your appreciation for my work. Thank you!

Buy me a matcha latteBuy me a matcha latte

Or Send Bitcoin! bc1q4tz3qzp6a6zeduqema3v6s0vnrhst4zwy4wtp9

Key Bushing Replacement

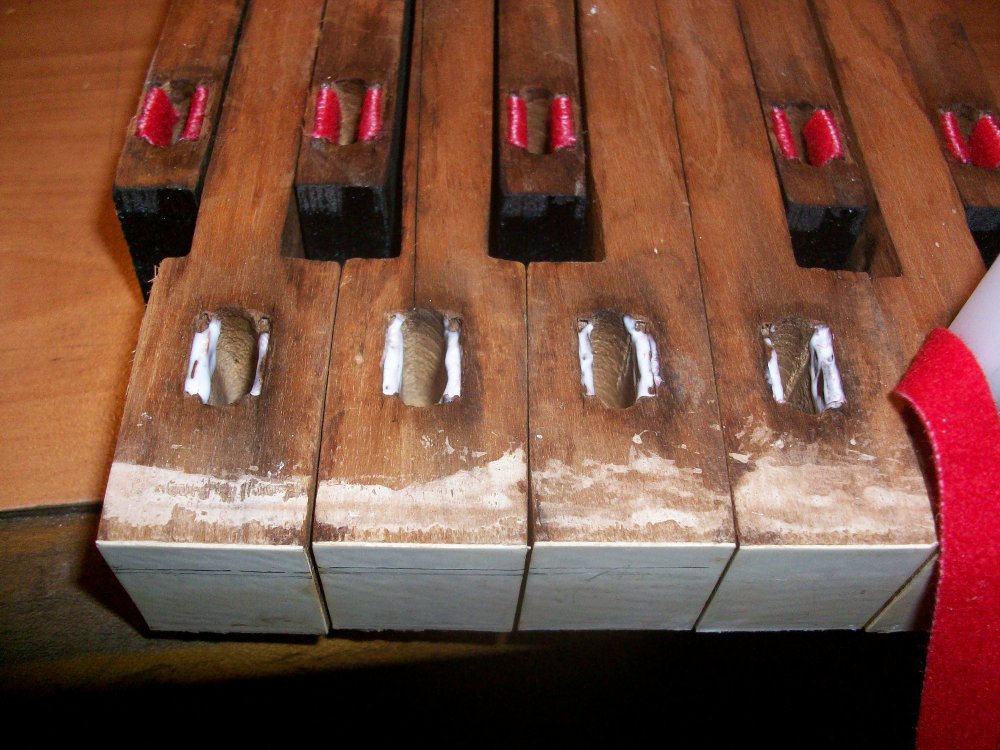
The key bushings of my Milton Player Piano had pretty much all fallen out, resulting in noisy keys that wobbled from side to side.  In order to recreate a smooth motion of the keys without sideways play, the balance rail bushings as well as the front rail bushings need to be replaced.  Each key interacts with two pins: the balance rail pin and the front rail pin.  The balance rail pin is in the center of the key, and allows the key to pivot forward and back.  The front rail pin is under the front of the key and guides the key to move in a vertical motion.  Both of these pins glide along felt bushings that are glued to the key.

To remove any bushings that haven't already fallen out, place a damp rag over the bushings and steam them with a hot clothes iron (see my post on keytop replacement for pictures of this).  Immediately after steaming, the key mortises need to be sized by allowing them to dry with an appropriate key mortise caul inserted.  I buy these cauls from Spurlock Specialty Tools.  There are several different sizes of caul that each corresponds to a specific size of pin that the keys pivot on.  Be sure to measure the front and balance rail pins with a micrometer in order to know which cauls to buy.

Front rail mortises with mortise sizing cauls in place

Front rail mortises with mortise sizing cauls in place

After the keys have fully dried, pull out the mortise sizing cauls.  All of the mortises should now be a uniform size and ready for bushings.  Before installing new bushings, I also ordered the .146" bushing cauls from Spurlock Tools (which match my .146" front and balance rail pins), as well as a few different thicknesses of Key Bushing Cloth from Schaff Piano Supply Company.

.146" Key Bushing Caul

.146" Key Bushing Caul

Before gluing anything in, push a bit of each thickness of bushing cloth into a mortise to see which one is the right fit.  The caul and cloth should push snugly into the mortise, but should not take any significant amount of force.  This step is crucial because too thick of a cloth will cause the keys to bind on their pins and too thin of a cloth will cause the keys to wobble side to side.

After I've picked the correct thickness of bushing cloth, I apply a bit of glue to both sides of the key mortise with a small brush.  I use PVC-E glue, but a PVA glue like Titebond will work, or if you want to get really serious, use hot hide glue.

PVC-E glue applied to the sides of the mortises

PVC-E glue applied to the sides of the mortises

If using PVC-E or PVA glue, work in sections of 5-10 keys at a time.  If using hot hide glue, only work on 1 or 2 keys at a time.  This is due to the fast set time of hot hide glue vs the others.

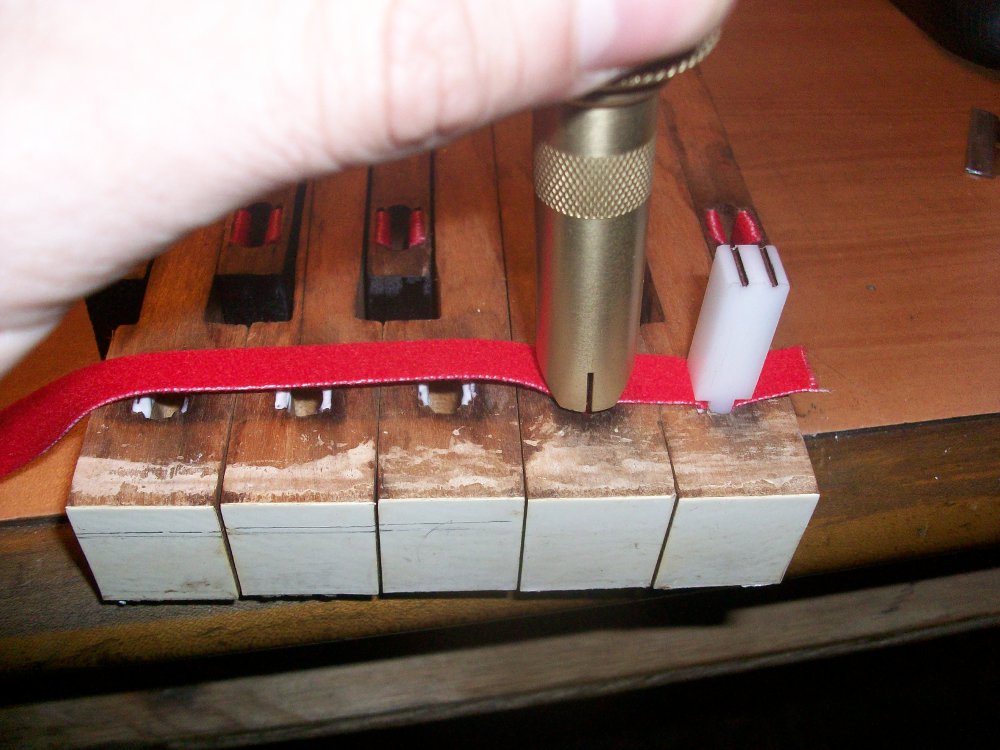
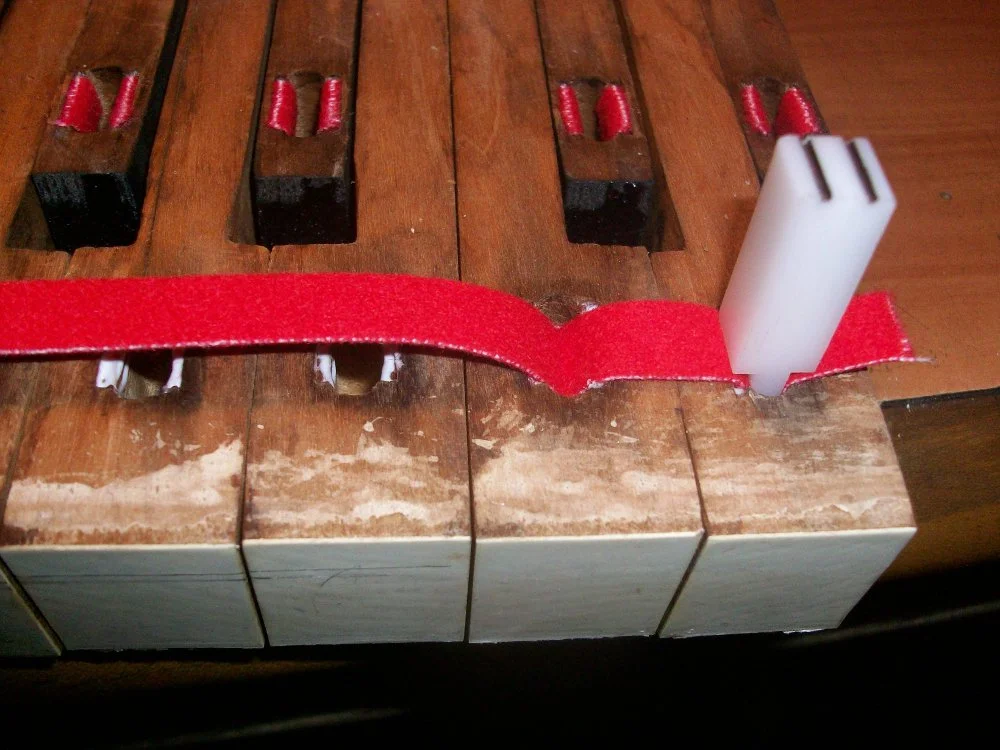
Once I have applied the glue to a section of keys, I lay the bushing cloth across the mortises, push the cloth into the mortise, and cut it in the center using my Bushmaster tool from Pianotek Supply Co.  This tool does a wonderful job setting the depth of the bushing cloth in the mortise as well as making a clean cut of the cloth.

The Bush master from Pianotek Supply. The blade on the end is normally recessed into the handle. Pushing on the black plunger causes the blade to emerge.

The Bush master from Pianotek Supply. The blade on the end is normally recessed into the handle. Pushing on the black plunger causes the blade to emerge.

The tool is first pushed into the mortise with the blade recessed to set the depth of the bushing cloth.  The plunger can then be pressed to cut the cloth.

bushmaster2
bushing caul2

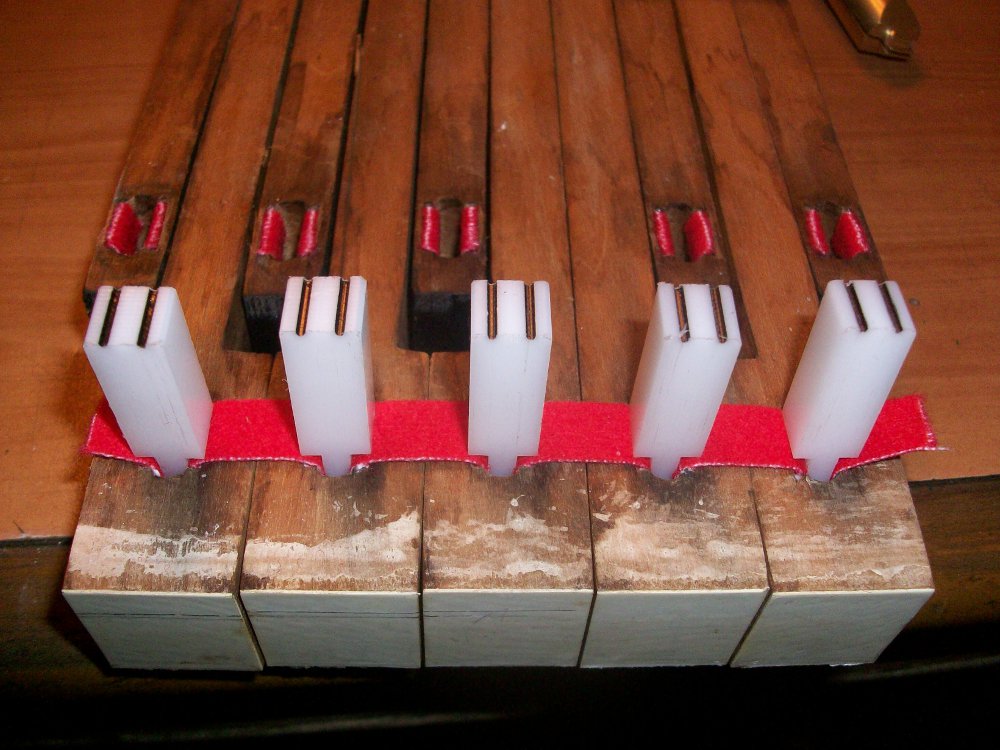
After the tool has been removed, push in a bushing caul to clamp the cloth against the sides of the mortise while the glue dries.  After you've finished this section of keys, set it aside while the glue dries, and begin on the next section.

All bushing cauls in place

All bushing cauls in place

Once the glue has dried, the final step is to trim the bushing cloth flush with the key by using a razor blade. Once all of the bushings have been trimmed, the keys are ready to be reinstalled in the piano.  If any of the keys bind on their pins, a gentle easing of the bushings my be necessary.  This is accomplished by gently squeezing the bushings with a pair of wide mouth pliers.  Here is a great video on easing key bushings https://www.youtube.com/watch?v=tKCy8s4H9GI

key bushing razor blade

Recent Blog Posts


See more of my blog posts here

Hello There! Don't Leave Just Yet!

I provide piano repair information on my blog and through email correspondence free of charge because I like to help people learn about pianos. However, it does take up a significant amount of my time. So, if you are so inclined, you can click the button below to help supply my caffeine habit and show your appreciation for my work. Thank you!

Buy me a matcha latteBuy me a matcha latte

Or Send Bitcoin! bc1q4tz3qzp6a6zeduqema3v6s0vnrhst4zwy4wtp9