Loose Tuning Pins CA Glue Repair

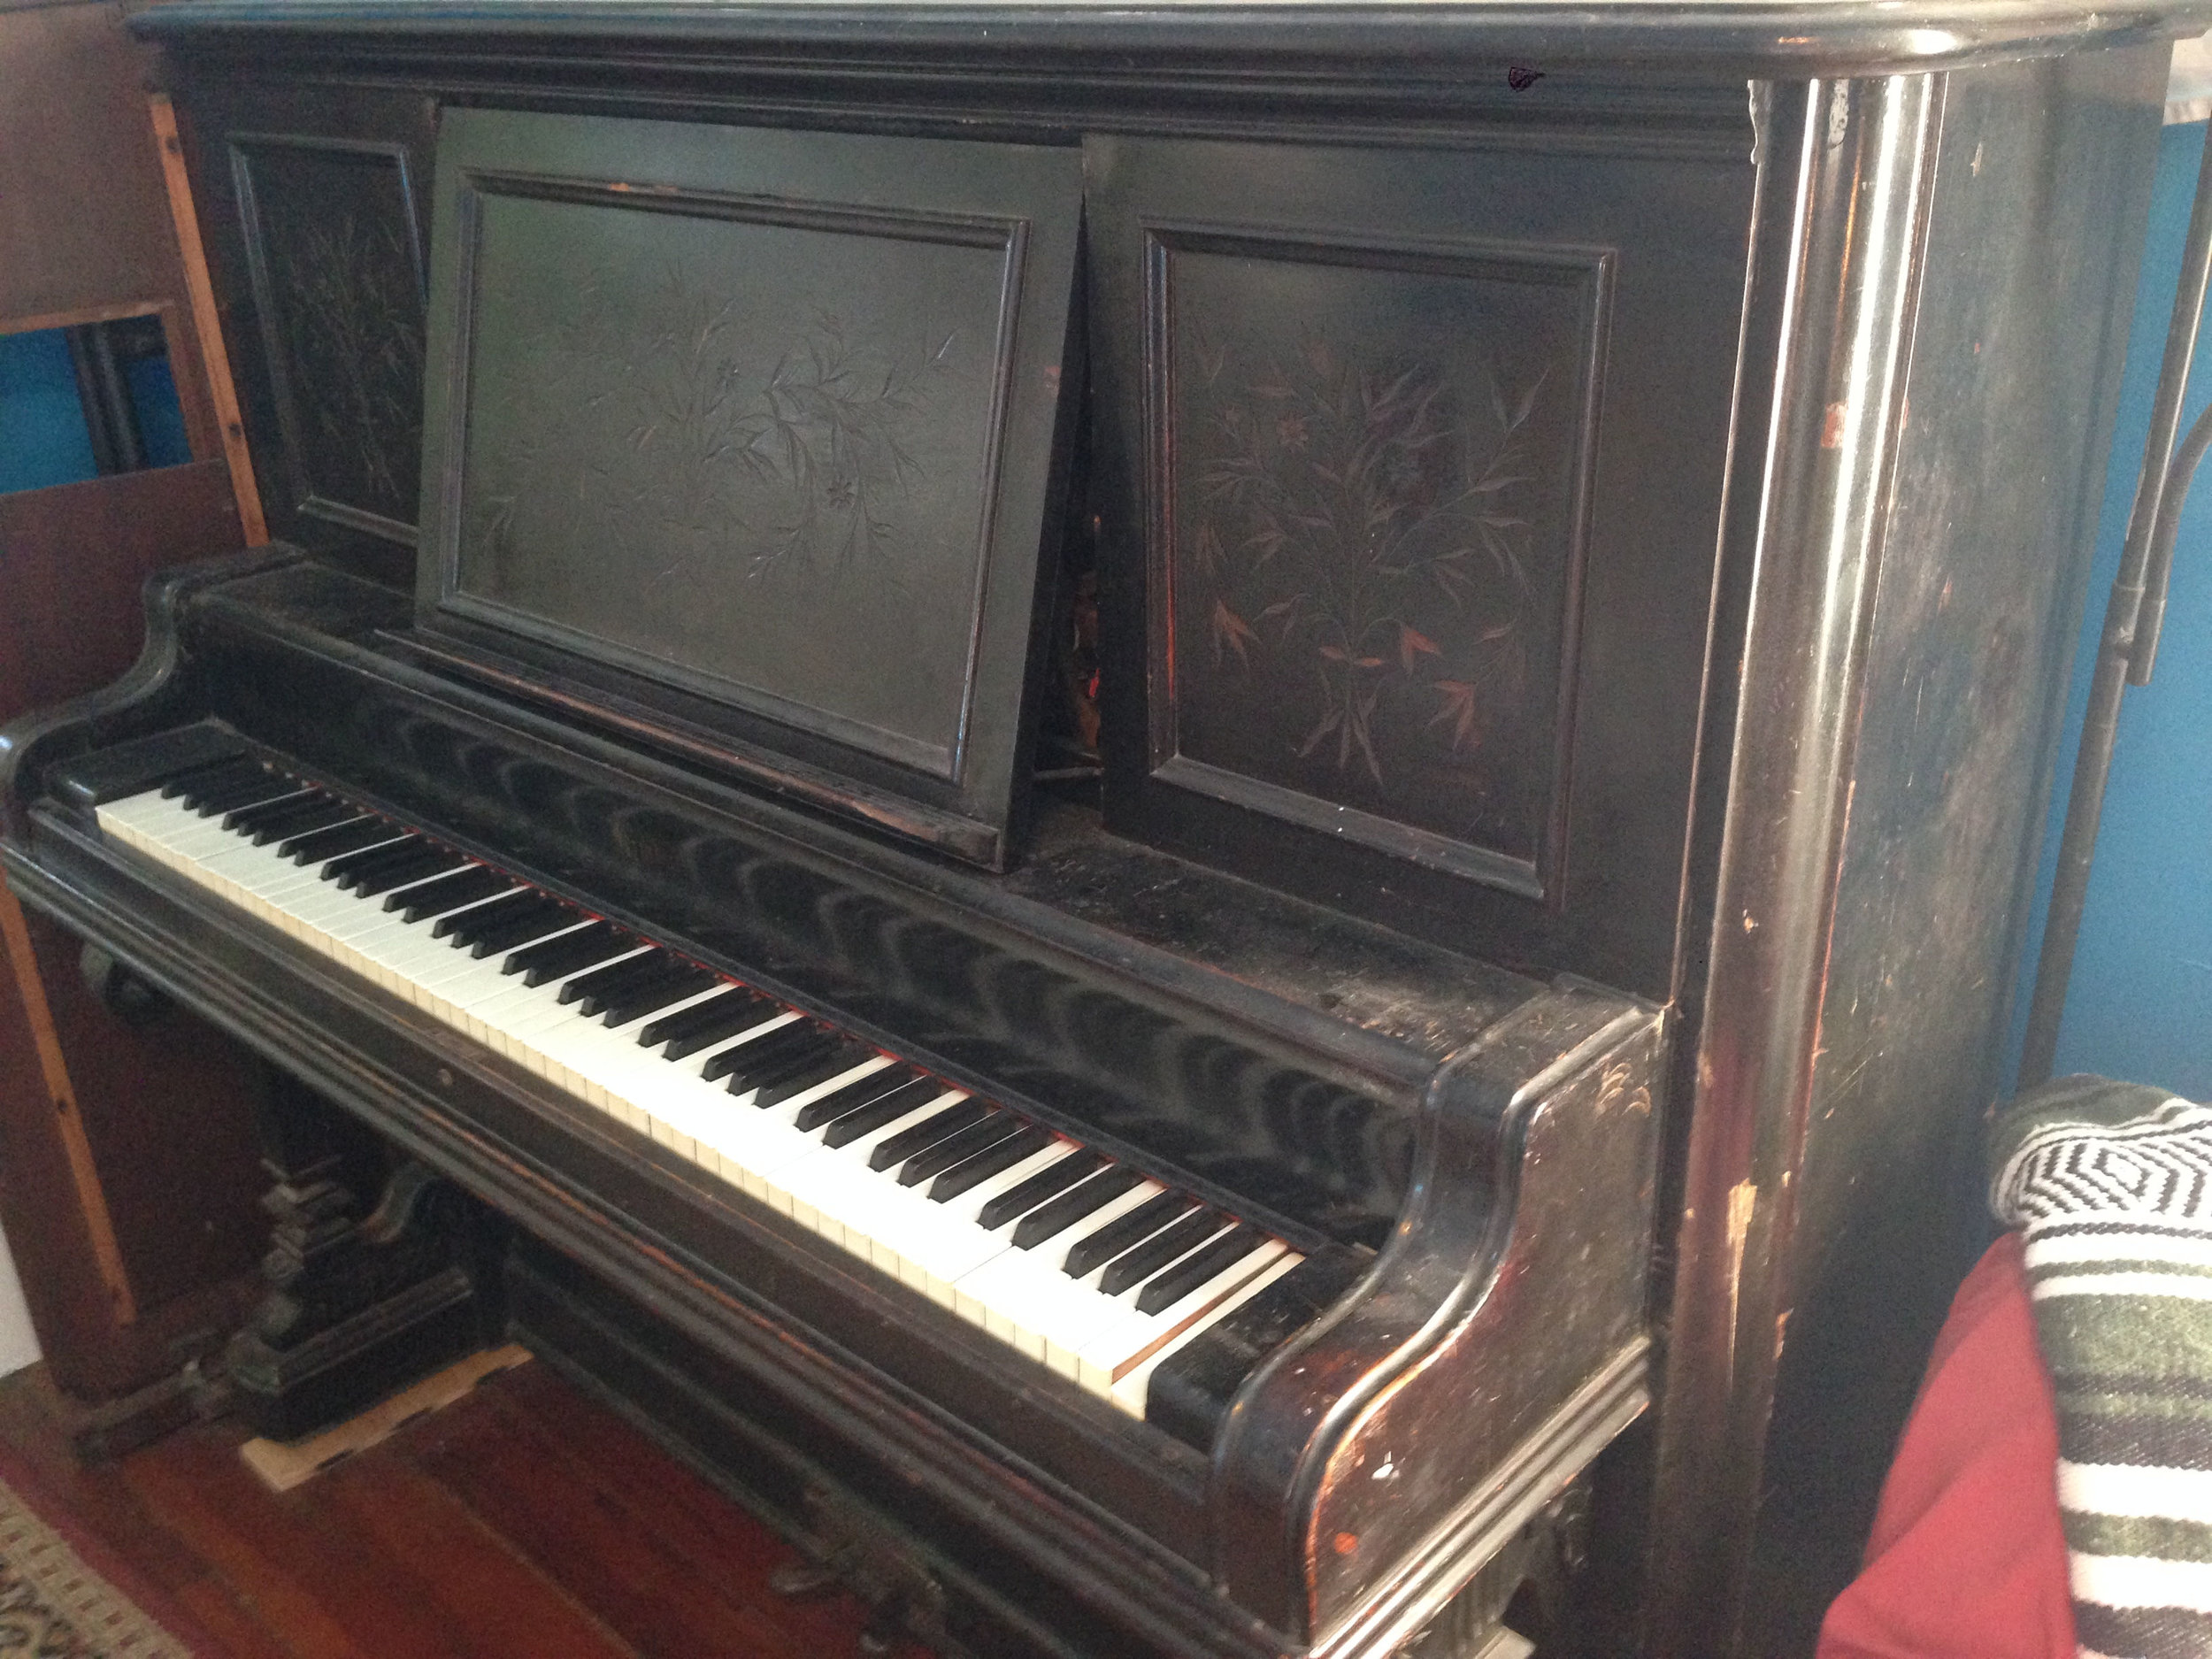
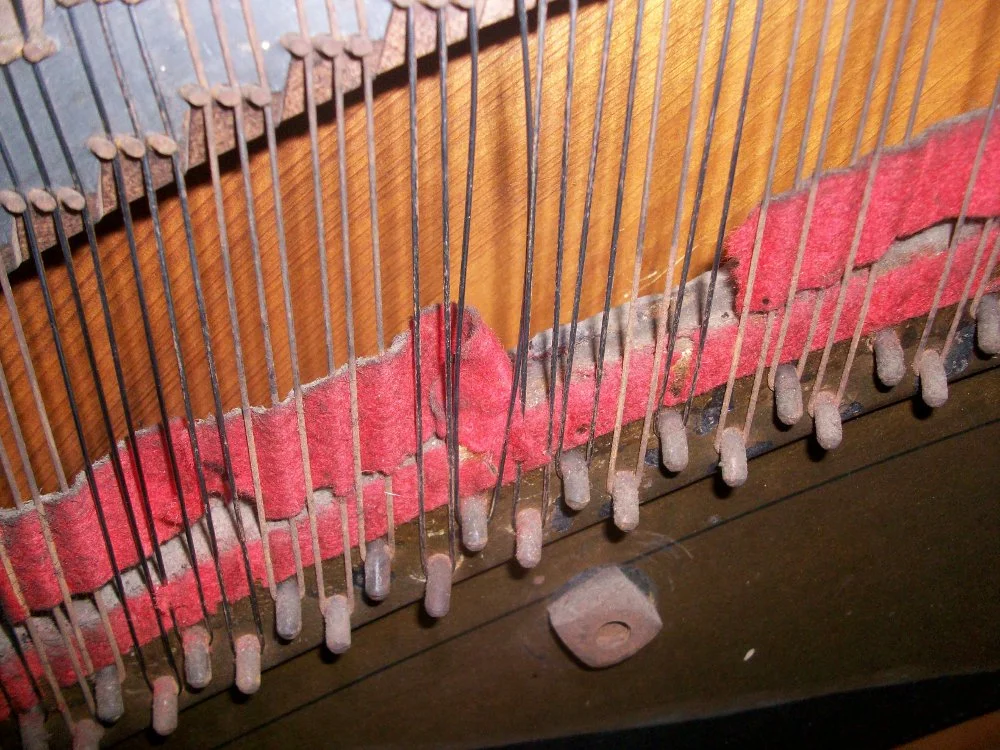
The Kimball upright that lives on the covered back porch at my house has had plenty of issues that I've been knocking out one at a time over the past year or two.  Probably the most annoying problem is that many of the tuning pins are not as tight in the pinblock as they should be.  The pinblock is a laminated block of hardwood mounted in the piano with holes drilled in it that the tuning pins fit tightly into.  In this piano, as with many others, the pinblock is hidden behind parts of the piano cabinet as well as the cast iron plate.  Some of the tuning pins here turn with only a pinky finger's worth of force on my tuning wrench.  That's not good, and it means that this piano only holds a tune for a very short amount of time before the tension of the strings and the pounding of the hammers causes them to go flat.

In Pianos Inside Out by Mario Igrec, he describes several labor-intensive processes to remedy this problem including replacing the original tuning pins with oversize ones or even replacing the entire pinblock.  However, he also details a much simpler process that can be used if the pinblock still has integrity but just needs a bit of extra friction on the tuning pin.

pinblock ca glue standing

To tighten up the tuning pins, he recommends treating the pinblock with CA glue (a.k.a. "super glue").  The piano needs to be laying on its back so that gravity will pull the glue through the holes in the cast iron plate and into the pinblock.  In the picture above, I've strapped the piano to an appliance hand truck which will give me more control when tipping the piano.

pinblock ca glue dry

Here you can see the holes in the plate that I will be feeding the glue into.  In some pianos there are wooden bushings that support the pin as it passes through the plate.  This piano does not have these bushings.  This makes applying the glue much easier, since it doesn't need to pass through a bushing before getting to the pinblock.

pinblock ca glue leverage
pinblock ca glue leverage2

I ran a couple of two-by-fours down through the handtruck in order to get more leverage while tipping the piano.  These things are heavy, so make it as easy as you can and get a friend or two to help.

I've also laid down an even larger board that I will rest the piano on.  This board will make it easier to get the piano back upright after the repair is finished.  Make sure you remove the action from the piano before you tip it over!

pinblock ca glue horizontal
pinblock ca glue

Here is the glue that I will be using.  I bought this from the wonderful folks at Pianotek Supply Company.   Basically, this stuff is just really thin super glue.  Normal super glue is too thick to really penetrate into the pinblock.  Don't glue your fingers together and try not too breathe in the fumes.

pinblock ca glue apply

The little straw helps me to get the glue right into the tuning pin hole.  I just keep adding glue until it seems saturated and the hole stays full for a few seconds.  All of the tuning pin holes need to be glued in one pass because after the glue has dried the pinblock will be sealed and any glue applied after that won't penetrate the wood.

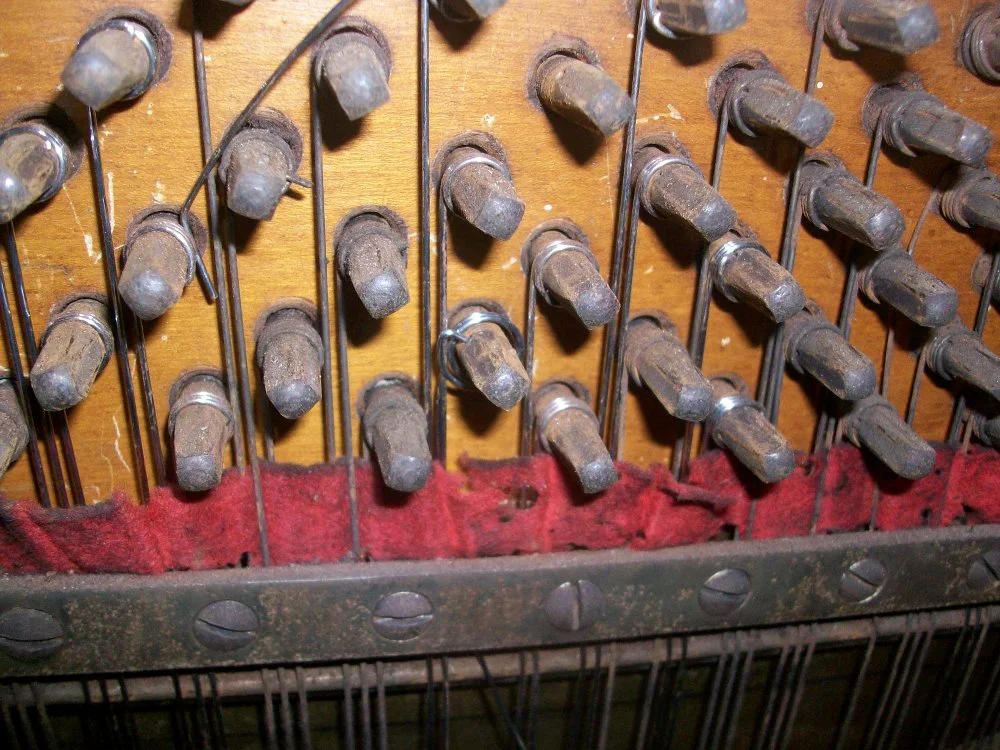
Tuning pins before applying CA glue.

Tuning pins before applying CA glue.

Tuning pins after applying CA glue.

Tuning pins after applying CA glue.

I ended up using a little under 2 oz. of CA glue for this, which is less than half of the bottle that I bought, but would have been about 20 of the standard size tubes of super glue.  I let the pins dry a few hours before tipping the piano back upright.  I then let it dry another couple of days before attempting to tune it and I can say that there is definitely an improvement in the torque required to turn the tuning pins.  Apparently there is debate about the longevity of this repair which I can't comment on yet, but I'll revisit this post later to comment on it.

Recent Blog Posts


See more of my blog posts here

Hello There! Don't Leave Just Yet!

I provide piano repair information on my blog and through email correspondence free of charge because I like to help people learn about pianos. However, it does take up a significant amount of my time. So, if you are so inclined, you can click the button below to help supply my caffeine habit and show your appreciation for my work. Thank you!

Buy me a matcha latteBuy me a matcha latte

Or Send Bitcoin! bc1q4tz3qzp6a6zeduqema3v6s0vnrhst4zwy4wtp9

Rebuilding a Milton Player Piano

So, this will just be an introductory post that will lead to several in-depth posts in the future.  My roommate came across this Milton player piano for free on Craigslist, so we went to Algiers Point a week or two ago and picked it up.   The bellows and player mechanism are not airtight, but are in remarkably good shape compared to the rest of the piano.  In the first few pictures you can see the piano with the player mechanism (as well as most of the keys) removed.  Half of the white key ivories are missing, most of the black ebony keytops are as well.  The steel pins that hold the keys in place are very rusty.  All of the key buttons have come unglued.  My next post about this piano will likely cover replacing the keytops, re-gluing the key buttons, and replacing the key bushings of all 88 keys.

milton player piano 1

I always number the keys before removing them from the piano.  This is extremely important because every key has a unique shape that is not interchangeable with any other key.  They usually have numbers stamped into them by the manufacturer, but these are often difficult to decipher.  Better to just renumber them in pencil or marker.  Because the key buttons are unglued, I also numbered those to match the keys, in case any of them fell while I was moving things around.

milton player piano keys

When removing the keys, I keep them taped together in groups of 10-20.  In this case I taped over the key buttons to keep them in place as well.  Normally I would tape them between the buttons and the keytops.

Rusty balance rail pins. These will need to be sanded and polished before reinstalling the keys.

Rusty balance rail pins. These will need to be sanded and polished before reinstalling the keys.

All of these pictures were taken after I spent probably 45 minutes cleaning several rats' nests out of this piano.  Take extra care when working with a piano that has had rodents in it, as their feces can carry diseases that are transmissible to humans.  Wear a surgical mask and gloves.

Front rail pins also need sanding and polishing. The red pieces of felt are key bushings that fell out when I removed the keys.

Front rail pins also need sanding and polishing. The red pieces of felt are key bushings that fell out when I removed the keys.

milton player piano action

The piano action itself is not in too bad of shape.  The hammers are worn and some have been chewed by rodents and/or come unglued.

Rodents love chewing on piano hammers.

Rodents love chewing on piano hammers.

This picture of the treble end of the action shows some previous work done. Notice the lighter replacement hammer butts as well as their green bridle straps, while the originals are red.

This picture of the treble end of the action shows some previous work done. Notice the lighter replacement hammer butts as well as their green bridle straps, while the originals are red.

milton player piano reservoir

Player pianos rely on suction created by the pumping of two pedals to operate the pneumatics that control the piano.  The previous picture shows a hole in the reservoir component of the bellows.  If the whole system isn't airtight, the player mechanism will not work correctly, if at all.

The bellows removed from the piano. Notice the two foot pedals that used to power the player mechanism. They swing out away from the bellows when they need to be used.

The bellows removed from the piano. Notice the two foot pedals that used to power the player mechanism. They swing out away from the bellows when they need to be used.

The next couple pictures show what is known as the "top stack".  This includes the tracker bar which "reads" the music rolls as well as a series of valves and pneumatics that translate suction into a push on the hammer of a specific note.  Also included is the wind motor which controls the movement of the music roll across the tracker bar.

88 sets of tubes,valves, and pneumatics. One for each key.

88 sets of tubes,valves, and pneumatics. One for each key.

The wind motor.

The wind motor.

Recent Blog Posts


See more of my blog posts here

Hello There! Don't Leave Just Yet!

I provide piano repair information on my blog and through email correspondence free of charge because I like to help people learn about pianos. However, it does take up a significant amount of my time. So, if you are so inclined, you can click the button below to help supply my caffeine habit and show your appreciation for my work. Thank you!

Buy me a matcha latteBuy me a matcha latte

Or Send Bitcoin! bc1q4tz3qzp6a6zeduqema3v6s0vnrhst4zwy4wtp9

Replacing a Broken String

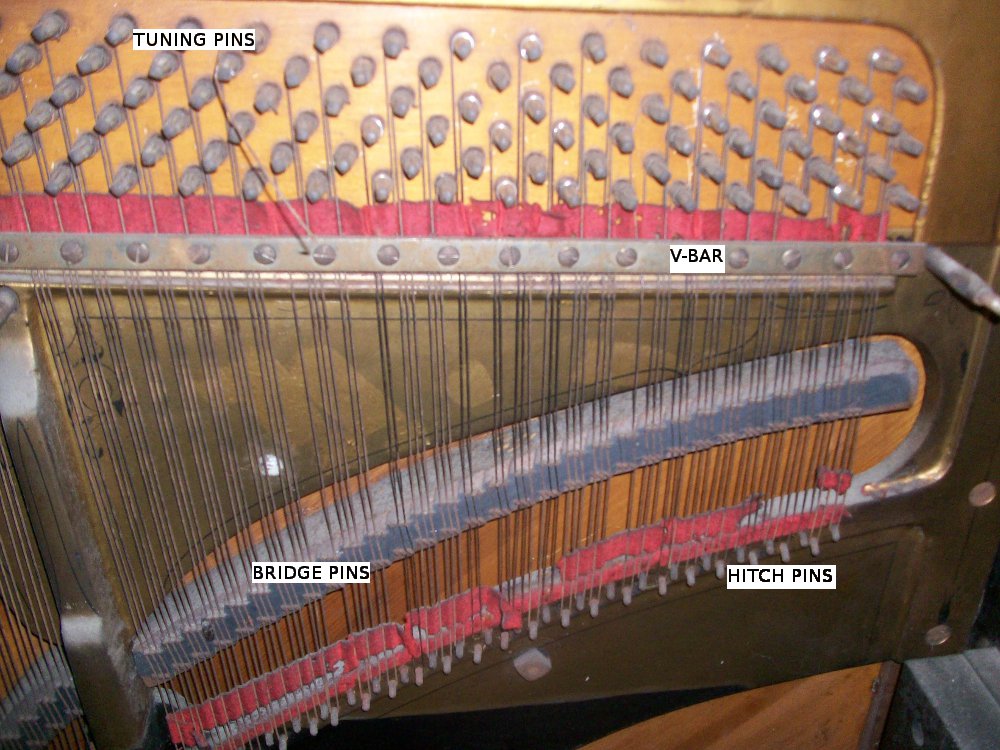
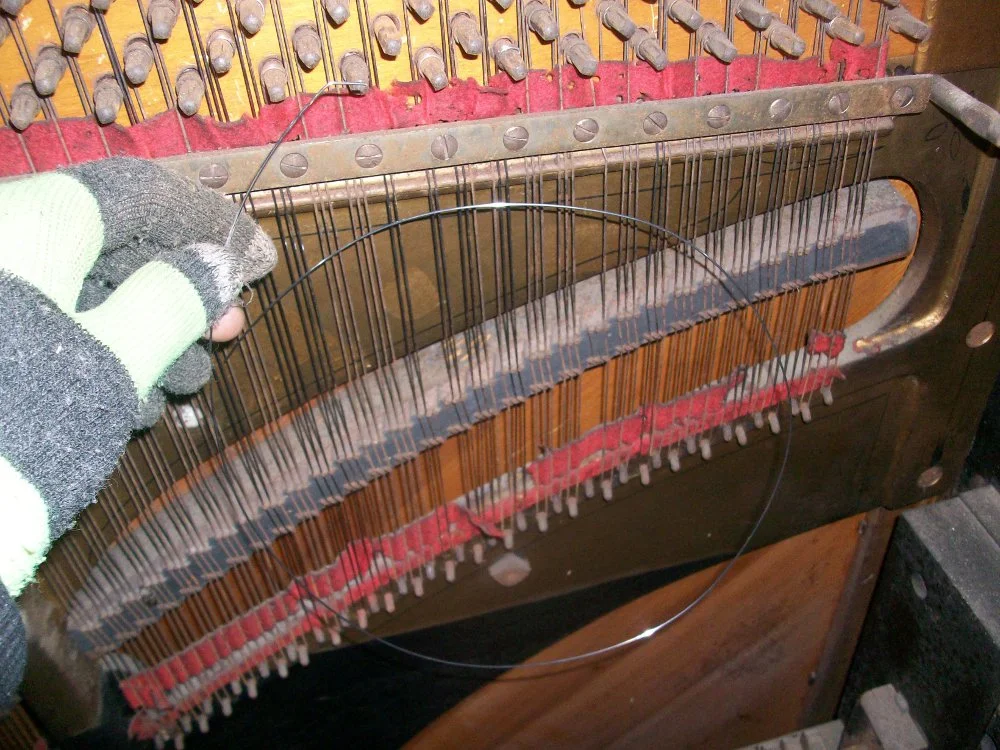
Broken strings can be a common occurrence on certain pianos, especially if it is an older instrument, has been exposed to high humidity, or is played with a heavy hand.  Most of the time, the strings that break will be the thinner ones in the highest section of the piano.  Unlike other string instruments in which each string only has one speaking segment, these strings actually have two.  The string starts at a tuning pin at the top of the piano, runs down through several guides, does a 180 degree bend around a hitch pin at the bottom, and then runs back up through more guides and into another tuning pin.  Except in the bass section, each note of the piano is produced by three different speaking lengths of strings.  I have already replaced several strings in this piano (the new ones are much shinier), but still have a few to replace.

web100_2424.JPG

The first step is to cut the broken string just below the v-bar in order to make removal easier.  The string must be measured with a micrometer or caliper to ensure that it is replaced with a string of the same thickness.  Treble piano strings range from size 12 (.029" diameter) to size 22 (.049" diameter) and come in 1/2 size increments.  This means that there is only a .001" difference between any two sizes.  Piano wire sizes can be confusing if you are familiar with wire gauge sizes which get larger in diameter when the size number gets smaller.  Often times, the string to be replaced will measure as in between two sizes (e.g. .0335").  In this case, choose the larger size as the string will tend to get slightly thinner as it is stretched while tuning.

tuningpins

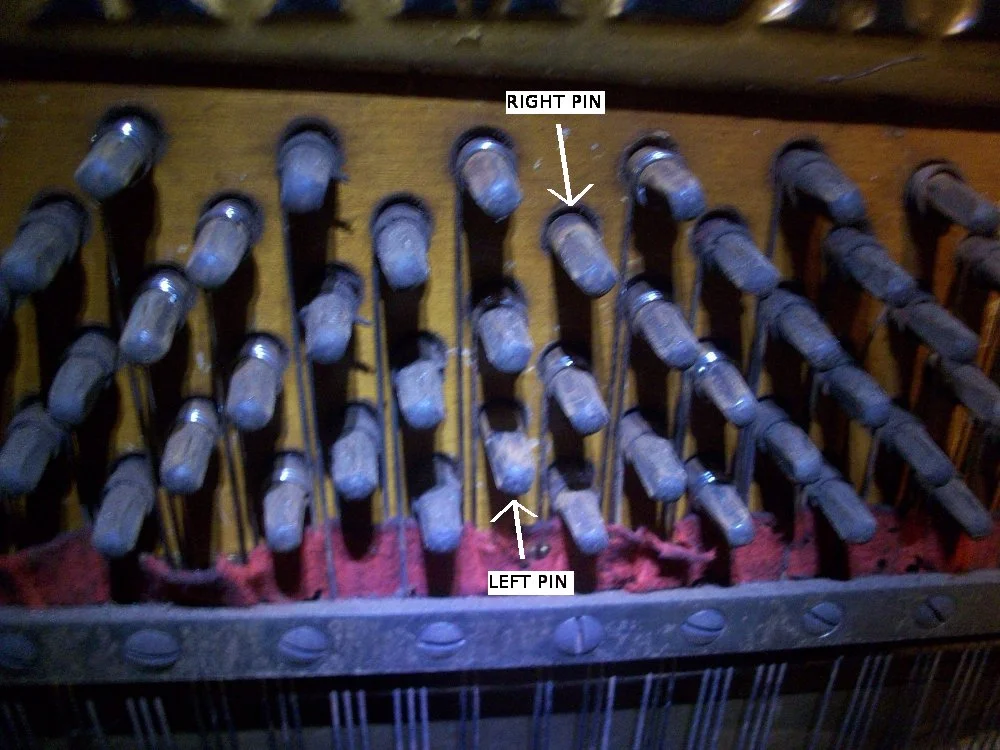
The left tuning pin can then be loosened (turned counterclockwise) one half a turn, and the remaining coil can be pried off with a needle-nose pliers and screwdriver.  The same can be done with the right tuning pin except with a full turn counterclockwise.  The picture above shows the two tuning pins after the old coils have been removed.

wirebreak

Piano wire can be purchased in short lengths for the replacement of a single string or in various sorts of coils like the one shown above.  Long lengths of wire are very springy and can quickly get out of hand if not held tightly in such a coil.

Replacement string

Replacement string

Dummy pin and stringing crank

Dummy pin and stringing crank

The oils that are produced by most peoples' skin can cause piano wire to rust, so I wear these thin cotton gloves whenever I need to replace strings.  I've cut a piece of wire that is long enough to span the distance from the tuning pin to the hitch pin and back plus about 6-8 inches.  This is to allow enough room to make the coils on each end, plus a little extra breathing room.

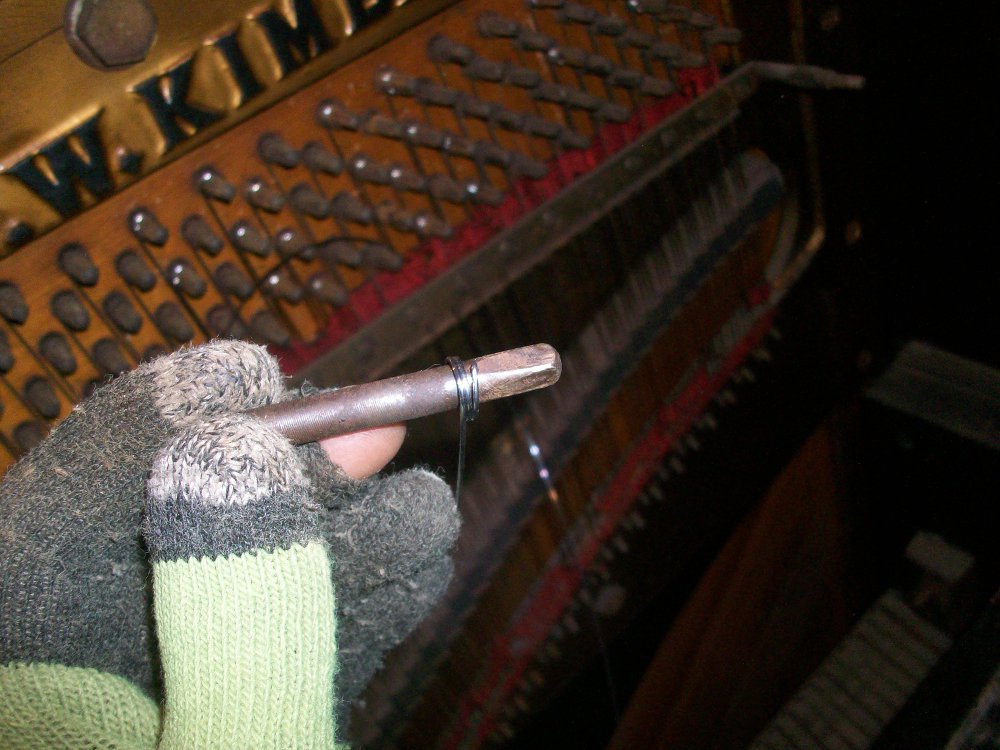
Start by feeding one end of the wire under the v-bar toward the left tuning pin. The next step is to make the first coil.  To do this, I use a dummy pin (a normal tuning pin removed from a scrap piano) and a stringing crank. Take the end of the wire that has passed under the v-bar and insert it through the hole in the tuning pin so that the end is flush with the surface of the pin.  Make a tight counterclockwise bend (called a "becket") in the wire and use the stringing crank to make two and a half tight coils on the pin.

Making coils on the dummy pin

Making coils on the dummy pin

Pry the becket out of the dummy pin, push the coil onto the left pin, and insert the becket into the tuning pin hole.  Pull the other end of the wire down and make a  bend around the hitch pin of a bit more than 180 degrees. The wire will spring back a bit and the bend should stick at about 180 degrees.  Feed the end of the wire up, under the v-bar again, and past the right tuning pin.

One end of the string has been coiled onto the left pin. The right pin still needs a coil.

One end of the string has been coiled onto the left pin. The right pin still needs a coil.

Bend the string around the hitch pin.

Bend the string around the hitch pin.

Measure four fingers' length past the right tuning pin and cut the wire.  Thread the end of the wire into the dummy pin until flush and make a coil until it is at the same height as the right tuning pin.  Remove the coil from the dummy pin, push it onto the tuning pin, and insert the becket into the hole.  At this point, make sure the string follows the same path that the strings around it have already established.  There are several staggered pins above the hitch pin (called "bridge pins") that the string needs to bend around in a specific way.

Measuring four fingers length above the tuning pin

Measuring four fingers length above the tuning pin

Now the pins need to be turned clockwise while keeping the coils tight together on the pin.  Tighten the right pin first, alternating between making small turns with a tuning wrench and squeezing the becket into the hole with large pliers.  You will also need to pull the coil toward you with a screwdriver or coil lifting tool while tightening the pin, in order to keep gaps from forming between the wraps of the coil.  Keep alternating until the pin has almost three full wraps on it, then switch to the left pin where the same process can be repeated.  Using a screwdriver, adjust the spacing of the strings just below the v-bar to match the spacing of the strings around it.  When both sides of the string are taut, the string replacement is finished and the string can be tuned.  New strings need to be tuned several times before they are "stretched" and will hold a tune for any length of time.

Recent Blog Posts


See more of my blog posts here

Hello There! Don't Leave Just Yet!

I provide piano repair information on my blog and through email correspondence free of charge because I like to help people learn about pianos. However, it does take up a significant amount of my time. So, if you are so inclined, you can click the button below to help supply my caffeine habit and show your appreciation for my work. Thank you!

Buy me a matcha latteBuy me a matcha latte

Or Send Bitcoin! bc1q4tz3qzp6a6zeduqema3v6s0vnrhst4zwy4wtp9

Kimball Damper Pedal Repair

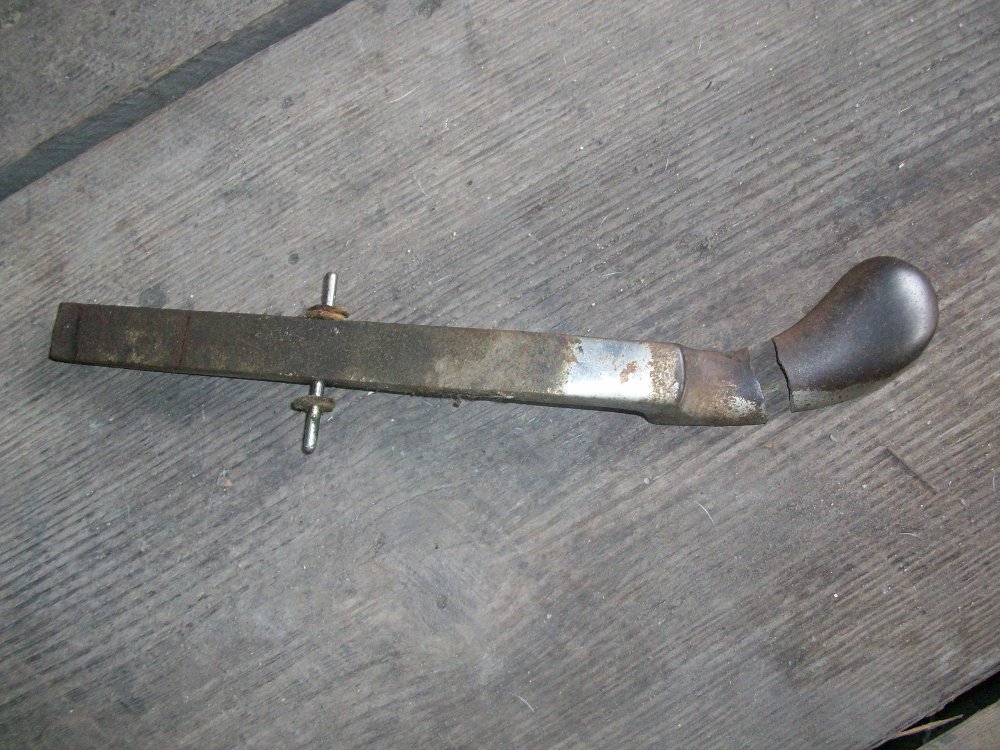
The damper pedal on my Kimball upright snapped in half the other day.  This is not a particularly common problem to have, and the repair involved some metalworking (which is a field that I suspect most piano technicians don't have much experience in), so it seemed a great candidate for my first blog post.

web1pedal.JPG

The repair process involves removing the broken pedal from the piano, cleaning both pieces, brazing them back together, sanding the repair smooth, and reinstalling.  Normally to remove a pedal on this piano, the entire piano must be tipped onto its back to remove the screws that hold the toe board on.  The toe board is the horizontal piece of wood that has square holes for the pedals to extend through.  In this case, the front half of the pedal was broken off and so the back half could be slid back through the toe board and removed from inside of the cabinet.
pedal_hinge.jpg

There are four screws that had to be loosened before the pedal could be removed.  The pedal operates by pivoting on a steel pin that is held on either side by a block of wood.  Also, note the steel wire that acts as a spring to return the pedal to its resting position when downward pressure is released.  Once the four screws are loose, the wood blocks can be pulled away from the pedal, and the pedal can be pulled out toward the top of the picture.

pedal_pin

Here you can see the pin that keeps the pedal from being pulled out of the front of the piano while the toe board is still in place. The pin can now be popped out with a hammer and punch.  Removing it will allow me to later reinstall the pedal through the front of the toe board, and then tap the pin into place through the wood blocks and back through the pedal itself.  While I have the pedal removed, I will also replace the felt bushings on the pin that reduce friction and provide quieter operation.

web4emery.JPG

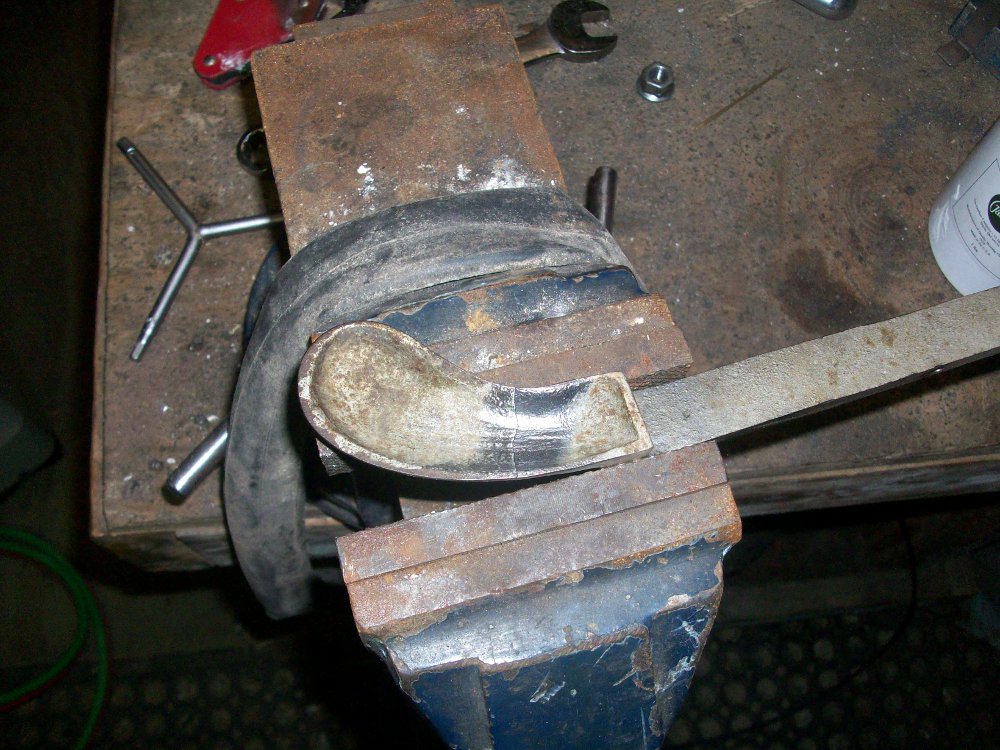
A clean joint is imperative for creating a strong bond while brazing.  I use multiple grits of emery cloth for cleaning up these joints.  Here you can see the clean joint that is ready to be fluxed and brazed.  

I've recently acquired a new brazing system.  I still have my old setup with standard oxygen and acetylene tanks and Smith torch and regulators which I will use for heavier duty brazing and cutting.  The new setup is much lighter duty and consists of a BBQ propane tank, a medical oxygen concentrator, and a lightweight Smith torch.  The main advantage to this system is convenience.  I only have to go 5 blocks to the nearest Walgreens to refill the propane, rather than 12 miles to refill my acetylene and oxygen.

My old brazing setup.

My old brazing setup.

My new brazing setup for light-duty work.

My new brazing setup for light-duty work.

With my joining surfaces cleaned up, I brushed on my "Stainless Light" Silver Brazing Flux from Cycle Design USA and proceeded to fire up my oxy-propane torch.  I brazed the pedal back together with 56% silver (also from Cycle Design USA) which worked fairly well.  

I did end up with a small spot that didn't fill in.  I think the pedal was just a little too thick for this torch to be really effective.  The oxygen concentrator can only put out about 8-9 psi, and I'm still figuring out the right pressure ratios.  It seems the propane needs to be at much higher psi than acetylene does for brazing.  On the bright side, the joint survived my testing, which consisted of holding the pedal on the square end and banging the round end against the table.

Flux applied to pedal.

Flux applied to pedal.

Pedal after brazing and before cleanup.

Pedal after brazing and before cleanup.

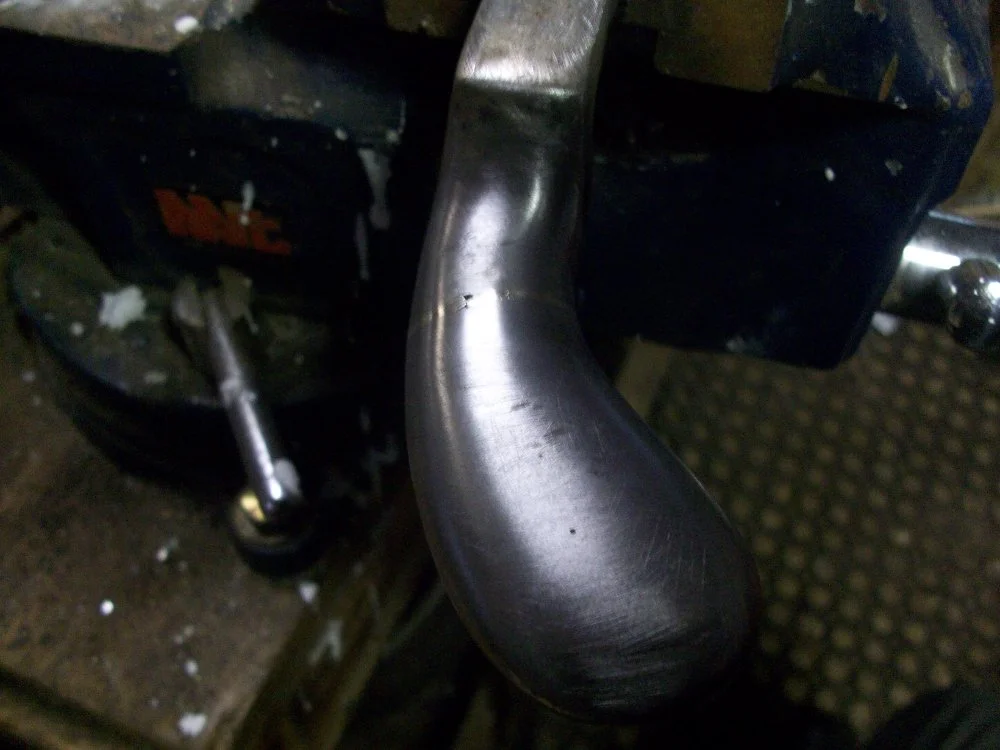
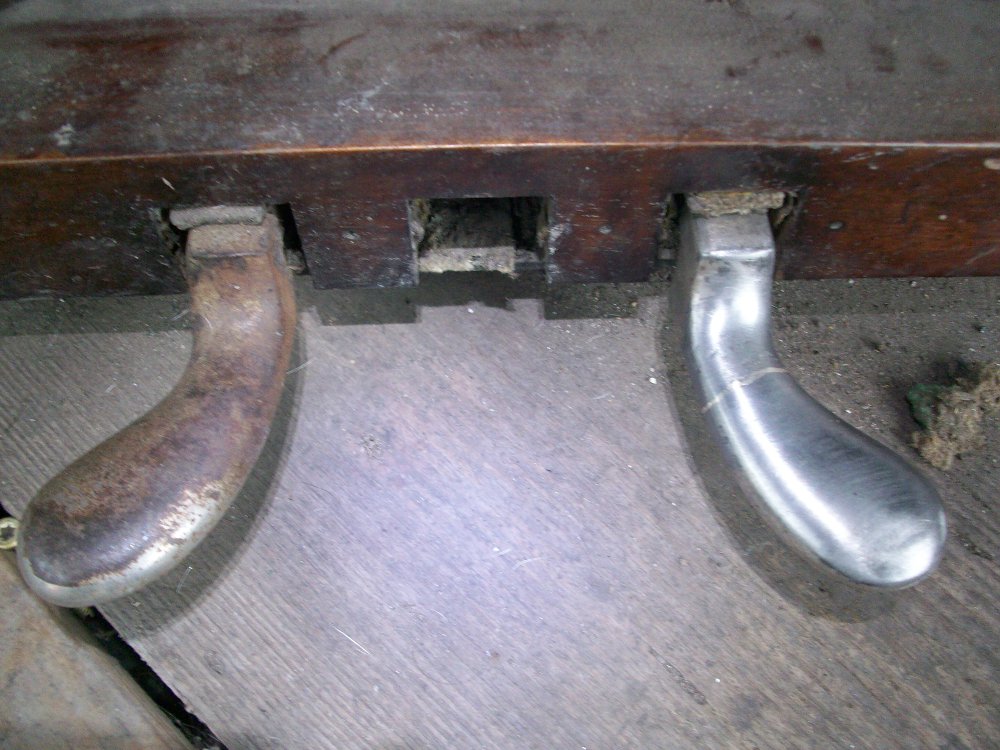
With the brazing done, I filed down the excess filler and sanded it smooth with emery cloth.  I then reinserted the pedal through the toe board and tapped the steel pin back into place with the new felt bushings.  I could have applied some kind of clearcoat to the pedal to keep it from rusting, but with the amount of friction this pedal will see against peoples' feet, I think I will just give it a rubbing of mineral oil every once in a while.

Pedal post-cleanup.

Pedal post-cleanup.

pedalreinstalled.jpg

Recent Blog Posts


See more of my blog posts here

Hello There! Don't Leave Just Yet!

I provide piano repair information on my blog and through email correspondence free of charge because I like to help people learn about pianos. However, it does take up a significant amount of my time. So, if you are so inclined, you can click the button below to help supply my caffeine habit and show your appreciation for my work. Thank you!

Buy me a matcha latteBuy me a matcha latte

Or Send Bitcoin! bc1q4tz3qzp6a6zeduqema3v6s0vnrhst4zwy4wtp9