How to Deep Clean an Upright Piano

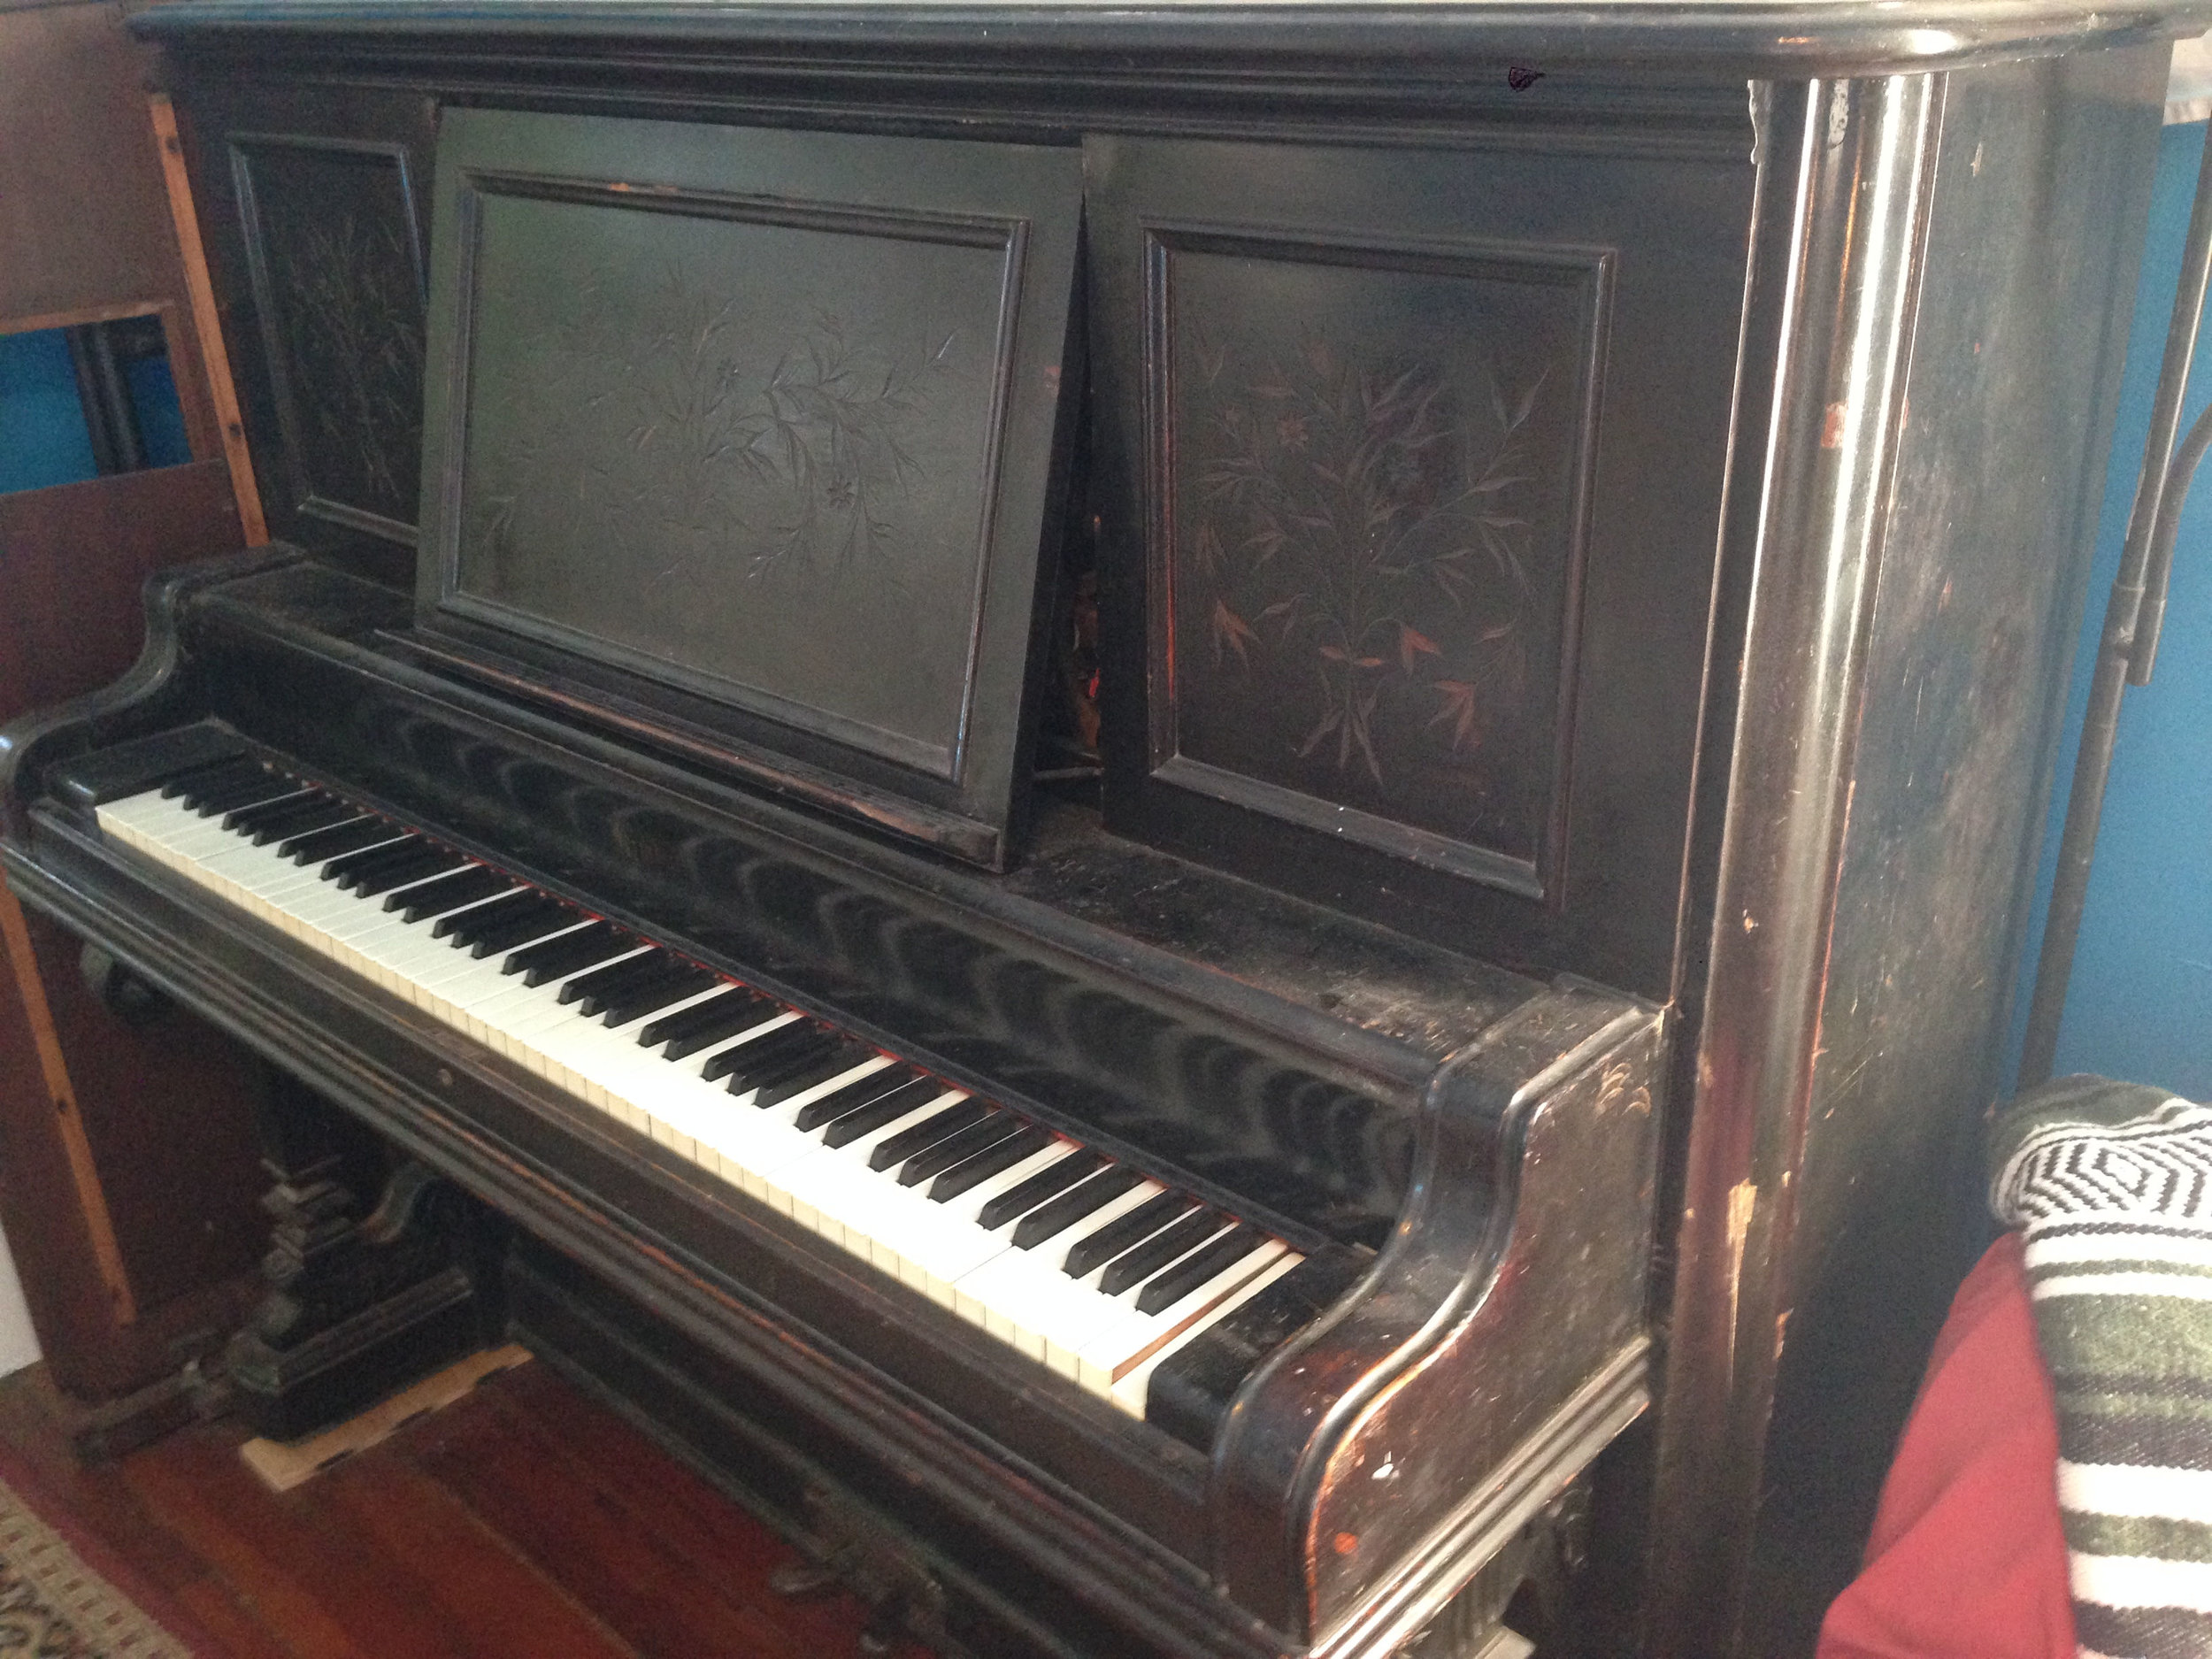
It is not at all unusual for me to open up a client's upright piano in preparation for tuning only to discover a thick layer of dust, a handful of pencils, old business cards, and assorted trinkets that have somehow fond their way into the piano cabinet.  The enormity of dust bunnies contained inside an old upright can horrify the unsuspecting.  This is an area of the home that can go decades without being exposed to daylight.  Although the inside of an upright piano is rarely seen, this kind of debris inside the piano can adversely affect your piano's function. Because of this, I recommend a yearly deep clean of any upright piano.

If your piano is particularly dusty, I highly recommend wearing a dust mask or respirator.  If you find any rodent droppings in your piano, please read my post about Hantavirus before continuing.

Photo Nov 28, 3 20 15 PM.jpg

No two upright piano models will disassemble in exactly the same way, but most tend to come apart in the following sequence:

Photo Nov 28, 3 20 38 PM.jpg

Lift the lid.  Some pianos will have a hinged half-lid like this one.  Some will have a hinged full lid that you can lean against the wall behind the piano.  Very occasionally, I will come across one that has the lid hinges at one end of the cabinet, instead of in the back.  Often times upright lids will have a small "catch" that will require you to give a firm pull upward on the lid in order to pop it loose.

Photo Nov 28, 3 21 44 PM.jpg

The front panel of the piano can now be removed.  Both the left and right sides of the cabinet will have either a protruding metal pin covered by a small wooden latch, or a protruding screw secured by a small metal latch.  Open the latch and tilt the front panel toward you.  Grab it by both ends and lift it out the piano.

Some studio uprights won't have any latches.  The front panel of these pianos will simply lift up and out of the cabinet.

Photo Nov 28, 3 22 23 PM.jpg

Using a vaccum, remove any accumulated dust from on top the the hammers and dampers.  You can also vacuum around the tuning pins.

The next step is where there will be the most variation between pianos.  A spinet piano may be sufficiently disassembled for deep cleaning at this point, while an older studio upright may still have several steps to go.  If you can vacuum the tops of and in between the keys, you have disassembled far enough.  If not, you will need to remove more cabinet parts.  

Some large upright have a decorative column on each end.  Remove the two large screws holding these columns to the cabinet, and set the columns aside.

The next part to remove is what I like to call the "sill".  This is the horizontal board just above the fallboard (the piece that covers the keys when the piano isn't in use).  This will also often be secured with a large screw on each end. Remove the screws and remove the sill.

Photo Nov 28, 3 23 16 PM.jpg

No matter what kind of upright you have, you should at this point be able to see the full lengths of the keys and be able to remove any debris that has accumulated on top of them.

Photo Nov 28, 3 25 02 PM.jpg

The next step is to remove the lower panel.  This is usually secured with one or two metal springs. The piano in the photo actually uses a wooden spring.

Photo Nov 28, 3 25 40 PM.jpg

Push upward on the spring(s) and pull the lower panel towards you.

Photo Nov 28, 3 25 56 PM.jpg
Photo Nov 28, 3 26 03 PM.jpg

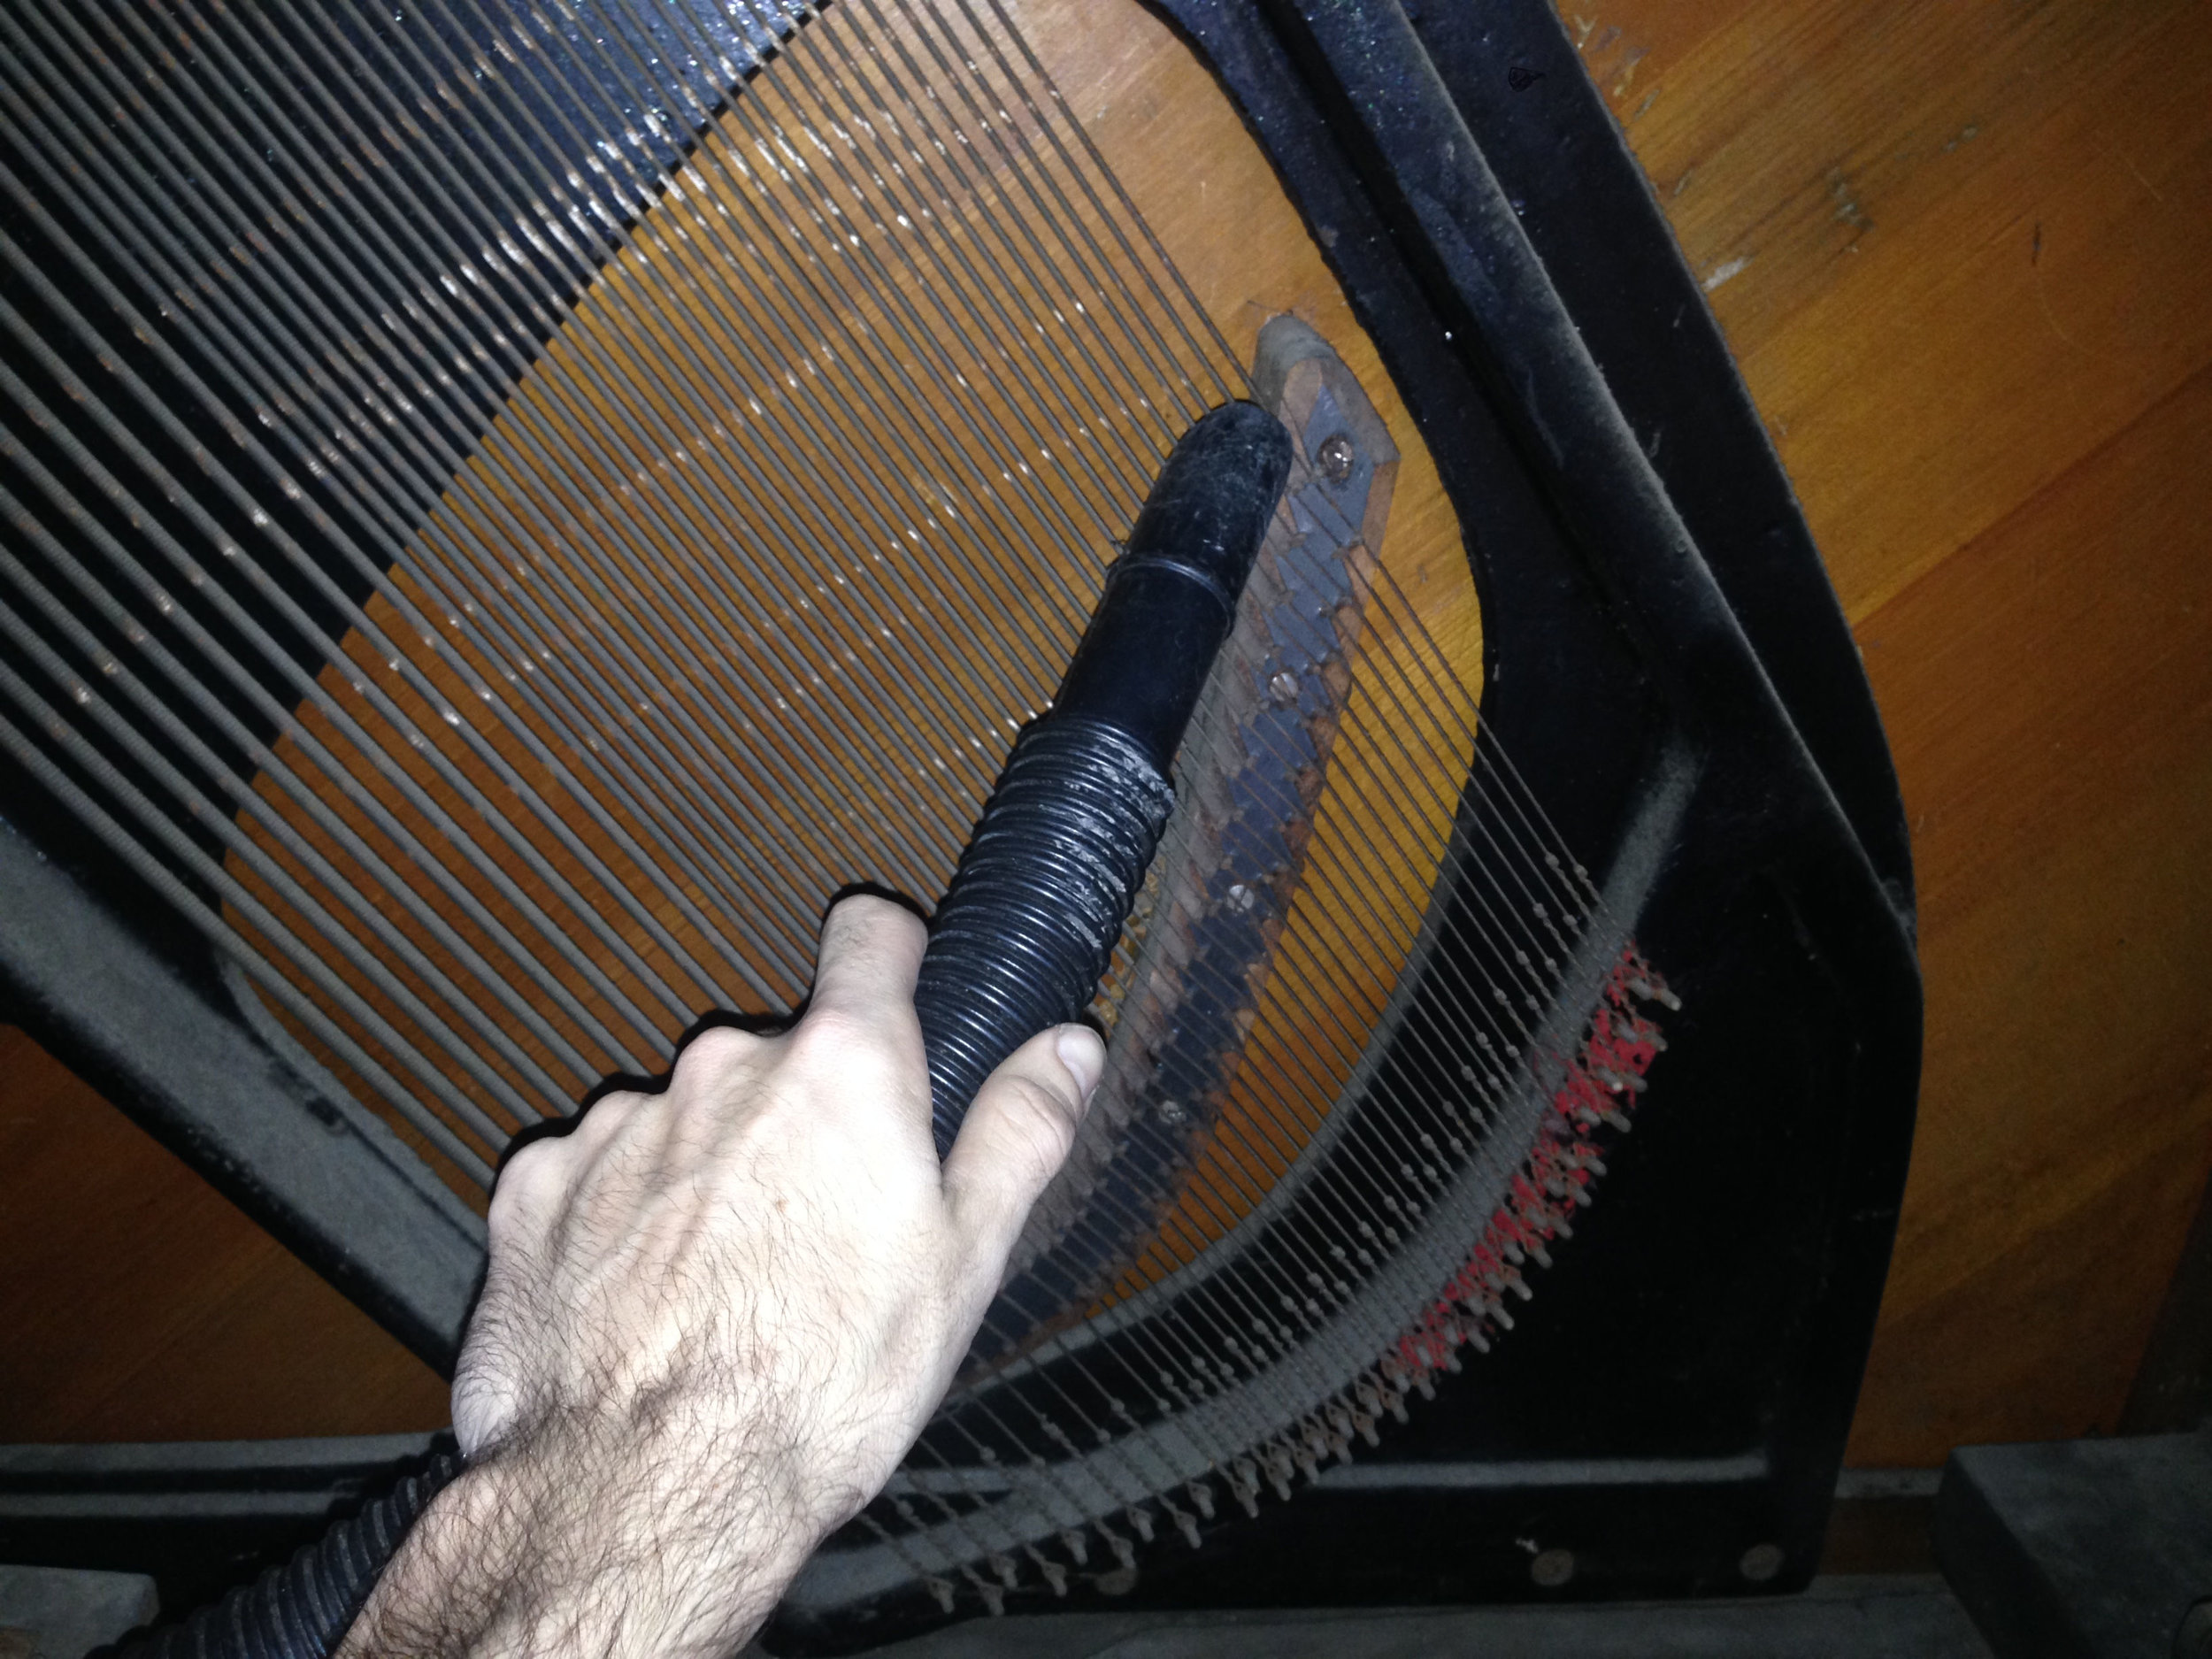
Once the lower panel is removed, run the vacuum along the strings, bridges, and hitch pins. 

Photo Nov 28, 3 27 14 PM.jpg

Remove any large debris from the bottom board of the piano and continue vacuuming around the pedal brackets and into the corners of the cabinet.

Photo Nov 28, 3 27 23 PM.jpg

That's it!  Re-assemble the cabinet and your piano can play smoothly for another year

Recent Blog Posts


See more of my blog posts here

Hello There! Don't Leave Just Yet!

I provide piano repair information on my blog and through email correspondence free of charge because I like to help people learn about pianos. However, it does take up a significant amount of my time. So, if you are so inclined, you can click the button below to help supply my caffeine habit and show your appreciation for my work. Thank you!

Buy me a matcha latteBuy me a matcha latte

Or Send Bitcoin! bc1q4tz3qzp6a6zeduqema3v6s0vnrhst4zwy4wtp9

How piano tuning can change your brain structure

I came across this interesting article from 2012 today that I thought I'd share.  The article is about a specific study that found significant differences in the areas of the brain related to memory and navigation when comparing piano tuners to control subjects.

http://www.ucl.ac.uk/news/news-articles/1208/29082012-Tuning-the-brain-piano-tuning-changes-brain-structure-Teki

Recent Blog Posts


See more of my blog posts here

Hello There! Don't Leave Just Yet!

I provide piano repair information on my blog and through email correspondence free of charge because I like to help people learn about pianos. However, it does take up a significant amount of my time. So, if you are so inclined, you can click the button below to help supply my caffeine habit and show your appreciation for my work. Thank you!

Buy me a matcha latteBuy me a matcha latte

Or Send Bitcoin! bc1q4tz3qzp6a6zeduqema3v6s0vnrhst4zwy4wtp9

How to Amplify a Piano

I recently tuned a baby grand piano for a local, well-known performance art venue. The venue was about to host a multiple Grammy Award winning artist, and called me in to tune and check over the piano. The piano wasn’t in the greatest shape, but the tuning went smooth enough. As I was finishing, an employee of the venue walked over to the piano with a vocal microphone in hand, stuck the mic in a random spot inside the piano, and asked me to play something so that they could sound check.

I looked at him quizzically, played a quick tune, and then started to gather my things. Before I left, I found my contact person at the venue and attempted to explain to him that “That…. is not how you mic a piano.” I gave him a few tips and left. I returned later that night to see the show and was wholly unsurprised that anything outside a small range in the treble section was practically inaudible, not to mention being able to hear the vibration of the plate that was being transferred directly to the mic.

A piano is a very difficult instrument to amplify well. There are many reasons for this. Pianos are not built with amplification in mind; they work best as a solo instrument in small to meduim size spaces. When playing along with other instruments or in very large spaces, the sound of an acoustic piano can very easily be lost.

The area that a piano’s sound is emanated from is almost as large as the piano itself. There is no obvious placement for a microphone like there would be for a guitar or a trumpet. Additionally, high and low frequencies are located at opposite ends of the instrument and cannot both be captured well by a single mic. During performances with other amplified instruments, the piano, even at close range, may be quieter than the ambient noise in the room which will basically cause any acoustic microphone to amplify the room instead of the piano.

I am not a sound engineer so I won't get into all of the ways that professionals amplify their pianos, but many other piano technicians that I’ve spoken to recommend the Helpinstill piano microphone. This system utilizes multiple magnetic sensor bars placed in close proximity to the strings that act similar to an electric guitar pickup. This system results in zero feedback and clear sound from the full length of the keyboard.

Since a Helpinstill system is not cheap, it can be cost prohibitive to install one. Luckily, there are plenty of resources out there describing ways to get good sound out of a piano using a type of microphone you are more likely to already own. This website has an almost-overwhelming amount of information on the subject.

Recent Blog Posts


See more of my blog posts here

Hello There! Don't Leave Just Yet!

I provide piano repair information on my blog and through email correspondence free of charge because I like to help people learn about pianos. However, it does take up a significant amount of my time. So, if you are so inclined, you can click the button below to help supply my caffeine habit and show your appreciation for my work. Thank you!

Buy me a matcha latteBuy me a matcha latte

Or Send Bitcoin! bc1q4tz3qzp6a6zeduqema3v6s0vnrhst4zwy4wtp9

Piano Tuning By Bicycle

My tool case. Behind the upper panel are replacement strings. Under the lower panel are adhesives, solvents, lubricants, gloves, and assorted pieces of felt and leather.

My tool case. Behind the upper panel are replacement strings. Under the lower panel are adhesives, solvents, lubricants, gloves, and assorted pieces of felt and leather.

One of the most common questions I get when I show up at a client's door is “Where did you park?” For some reason, people are very concerned with the well-being of my vehicle. The answer to their question is, of course, “nowhere” as I don't own a car. However, out of fear of being judged as unprofessional, I usually say something along the lines of “Oh, I'm just down on the corner.” This isn't completely false, as my bicycle is usually locked up down on the corner.

Many technicians on piano tuning forums write of dragging large rolling suitcases from their car into client's homes for every job. Forums are also full of references to keeping all kinds of rarely used tools and materials in the trunk of the tuner's car just for that one or two jobs a year that they might be needed for.

This seems absurd to me. One of the great things about tuning is that there are only three absolutely essential tools: a tuning wrench, a set of mutes, and either a tuning fork or an electronic tuning device. Sure, some jobs require tools other than these, but many tunings are performed where the “big three” are the only tools that are touched by the technician.

I carefully select the tools that I carry with me to maximize utility and minimize volume and weight. I bring one tool-case to all of my tunings. The tool-case fits on the front rack of my bicycle and it contains all the tools I need to complete 95% of the tunings I go on. Anything that requires more in depth work gets a second visit during which I bring the special tools and supplies needed. A big part of  knowing which tools to bring is having a conversation with my client before I even show up at the door. When was the last time the piano was tuned? Where did it come from? Does the piano have any other issues besides the tuning? If I know the specific piano's problems ahead of time, I don't need to bring 50 pounds of tools and supplies with me. Five to ten pounds will almost always suffice.

The other important part of piano tuning by bicycle is maintaining a small service area. My service area is anywhere within about a five-mile radius around my house. Any calls I get from outside this area are referred to another tuner who gives me a finder's fee. Sure, I make less money by turning down these calls, but I also am saving gobs of money on auto loans, insurance, gas, parking, and repairs. Not to mention the stress of driving, which many people don't seem to take into account.

As far as I can tell, cycling piano tuners are pretty few and far between. I have only found two others – one in Chicago and one in the UK. There may be more out there who, like me, don't generally advertise their two-wheeled transport. In “The Secret Life Of Pianos” a piano tuner is profiled who rides a motorcycle to his appointments. While not much different, I imagine that the motorcycle is seen as more of a “real” mode of transportation than the bicycle. Perhaps, as bicycling piano tuners become more commonplace, we can finally tell our clients “Oh, I parked my bike right there on the corner.”

Recent Blog Posts


See more of my blog posts here

Hello There! Don't Leave Just Yet!

I provide piano repair information on my blog and through email correspondence free of charge because I like to help people learn about pianos. However, it does take up a significant amount of my time. So, if you are so inclined, you can click the button below to help supply my caffeine habit and show your appreciation for my work. Thank you!

Buy me a matcha latteBuy me a matcha latte

Or Send Bitcoin! bc1q4tz3qzp6a6zeduqema3v6s0vnrhst4zwy4wtp9

Hantavirus

A deermouse. (via Wikipedia)

A deermouse. (via Wikipedia)

Five years ago, I spent a few days hiking in Yosemite National Park with my family.  A few days after we left, the National Park Service put out a notice of an outbreak of Hantavirus – a disease transmitted by air and hosted by mice.  This was the first time I had ever heard of this virus with nearly a 40% fatality rate.

The relevance of this virus to piano tuners and piano owners is that old pianos often serve a second purpose as mouse hotels.  Even if you haven't seen any mice around your house, if you haven't physically opened up your piano in the past few years and checked for mice nests or droppings, there is more than a slim chance that mice live or have lived in your piano.  I would say that over 25% of upright pianos that I open up show some sign of mouse inhabitation.

There is a lot of concern about Hantavirus in the piano technician community (rightly so), but I find that there is also a lot of misinformation. I'd like to try to clear things up a bit here.

First of all, the Center for Disease Control and Prevention (CDC) is the best place to get good, non-sensationalized information about this issue. Hobbyist and even professional web forums are full of hyperbole and misinformation.

Hantavirus was first recognized in 1993 in Northwest New Mexico. Since it's discovery, more than 96% of reported cases have occurred west of the Mississippi River.

Hantavirus is spread through rodent feces and urine. It is kicked up into the air when mouse droppings are disturbed and causes infection when breathed in by humans. Hantavirus doesn't seem to live long once exposed to air or sunlight. For humans to become infected, there must be an active mouse infestation. Droppings that are more than several days old are unlikely to harbor the virus.

There have been only two cases of Hantavirus with known exposure in Louisiana.

The virus is carried by several species of rodent: the deer mouse, cotton rat, rice rat, and white-footed mouse. All of these usually live in rural areas, but the deer mouse and cotton rat can sometimes be found in cities under certain conditions. House mice rarely, if ever, carry the virus. Barns, sheds, and other unattached structures in rural areas are the most common places to find the virus, and therefore require the most caution when cleaning or working in.

Deer Mouse habitat.

Deer Mouse habitat.

Cotton Rat habitat.

Cotton Rat habitat.

White-footed Mouse habitat.

White-footed Mouse habitat.

Rice Rat habitat.

Rice Rat habitat.

Though there is no anti-viral treatment for Hantavirus, early detection does increase the likelihood of survival. Early symptoms are similar to the flu (fever, fatigue, muscle ache, upset stomach). These then progress into serious respiratory problems.

If you are showing these symptoms, be sure to mention any potential rodent exposure to the diagnosing physician.

Hantavirus is not contagious and cannot be spread by sneezing, coughing, kissing, or other bodily contact.

The best way to prevent Hantavirus infection is to eliminate the presence of rodents in and around your home. The Canadian Center for Occupational Health and Safety gives these tips:

  • Storing food (including pet food), water and garbage in heavy plastic or metal containers with tight fitting lids.

  • Sealing any holes in structures where mice may enter.

  • Cutting back thick brush and keep grass short. Keep woodpiles away from the building.

  • Using rubber or plastic gloves when cleaning up signs of rodents, handling dead rodents, or other materials.  When finished, clean gloves with soapy water before taking them off. Wash hands with soapy water (again) after removing the gloves.

  • Setting traps when necessary.  Put rodents in a plastic bag, seal the bag, and dispose.


Mouse nests and droppings can be soaked with a 1:10 solution of bleach & water. The nest material should be sealed in plastic and disposed of. All reusable gloves, respirators, or other protective gear should be wiped down with the bleach solution as well.

Hantavirus Pulmonary Syndrome Cases, by State of Exposure. (via cdc.gov)

Hantavirus Pulmonary Syndrome Cases, by State of Exposure. (via cdc.gov)

Recent Blog Posts


See more of my blog posts here

Hello There! Don't Leave Just Yet!

I provide piano repair information on my blog and through email correspondence free of charge because I like to help people learn about pianos. However, it does take up a significant amount of my time. So, if you are so inclined, you can click the button below to help supply my caffeine habit and show your appreciation for my work. Thank you!

Buy me a matcha latteBuy me a matcha latte

Or Send Bitcoin! bc1q4tz3qzp6a6zeduqema3v6s0vnrhst4zwy4wtp9