How to Use a Wire Brake

Piano wire tends to be very springy and hard to control.  New piano wire comes in long lengths that are wrapped into tight coils.  Piano wire manufacturers package these coils in a few different ways: canisters, sheet metal brackets, zip ties, and wire brakes.  Each method has its advantages and disadvantages.  I definitely prefer to use wire brakes, as they offer the most secure hold on the wire as well as the most control when unwinding a length of wire.

When these wire brakes come in from Schaff, the center bolt is usually overtightened to keep the wire from potentially unwinding during shipping.  The first thing I do is loosen the bolt a little bit until the arm can rotate around the coil with some friction.  This is done by holding the thumbscrew with one hand and turning the wing-nut on the other side just a bit with the other hand.  Sometimes the wing-nut is so tight that a pliers is needed to turn it.

When working with piano wire, I wear some thin cotton gloves to keep the oils from my fingers off of the wire.  These oils will cause the bare steel wire to rust very quickly.

To use the wire brake, hold the arm of the brake in between the thumb and index finger of one hand.  Make sure you are not hanging on to the round part of the brake. Grab the end of the wire with a pliers and pull a length of wire out of the brake.  The round part of the brake will spin as the wire unwinds.

Once I have pulled as much wire as I need, I use the pliers to squeeze the wire against the bend at the tip of the arm.  This causes a tight bend in the wire that will catch in the small hole in the arm and keep the wire from unwinding.

The wire brake can now be put away until the next time it is needed.

Recent Blog Posts


See more of my blog posts here

Hello There! Don't Leave Just Yet!

I provide piano repair information on my blog and through email correspondence free of charge because I like to help people learn about pianos. However, it does take up a significant amount of my time. So, if you are so inclined, you can click the button below to help supply my caffeine habit and show your appreciation for my work. Thank you!

Buy me a matcha latteBuy me a matcha latte

Or Send Bitcoin! bc1q4tz3qzp6a6zeduqema3v6s0vnrhst4zwy4wtp9

Review of Stuart Isacoff's "Temperament"

All of the piano repair books that I have read have included a short section on the development of equal temperament and it's predecessors, but none of them really dig deeply into the subject. These books did their job of piquing my interest in the topic. For those not familiar, equal temperament is a system of tuning for stringed instruments in which every note within the octave is equally spaced. Basically, this allows a song to be transposed into any key and still sound musically pleasing. In non-equal temperaments there exist so-called “wolf” intervals. Aptly named, these intervals produce sounds that resemble the howling of a wolf and thus had to be avoided by musicians and composers at all costs. So, how was equal temperament developed and why was it so difficult to achieve?

Isacoff's “Temperament” gives an in-depth history of the development of piano tunings and temperaments starting with Pythagoras's perfect fifths in 6th century BC, moving through Da Vinci, mean-tone temperament, Galileo, Zarlino, and Rameau, and finishing with contemporary minimalists such as Michael Harrison and Philip Glass. It also describes the many attempts to circumvent the problems presented by unequal temperament by adding anywhere from five to twenty extra keys to the standard twelve-note octave.

I have mixed feelings about this book. “Temperament” is advertised as an “engaging and accessible account” which to me means that it was not written with the professional piano tuner in mind. This is great news for people with a passing interest in how western music came to sound the way it does. However for those with a more technical interest, it is probably not the book you are looking for. This book does not really get into the math behind the development of equal temperament. The closest it gets to the technical aspect is describing the basic ratios that make a major third, perfect fourth, perfect fifth, etc. The book seems to be written for history buffs rather than people who really want to understand the mathematical qualities of different temperaments and how they were developed. Also, there is a lot of filler in this book that doesn't really seem relevant to the topic. There are sections of the book where the author will go on a tangent for many pages about the personal lives of 16th century royalty.
Some knowledge of basic music theory will help in understanding the content of the book. For people who are familiar with the word “temperament” and its meaning, but don't have the desire to dig into the hundreds of varieties of just-intonation and unequal temperament, "Temperament" is a thorough account and a fantastic read.

Recent Blog Posts


See more of my blog posts here

Hello There! Don't Leave Just Yet!

I provide piano repair information on my blog and through email correspondence free of charge because I like to help people learn about pianos. However, it does take up a significant amount of my time. So, if you are so inclined, you can click the button below to help supply my caffeine habit and show your appreciation for my work. Thank you!

Buy me a matcha latteBuy me a matcha latte

Or Send Bitcoin! bc1q4tz3qzp6a6zeduqema3v6s0vnrhst4zwy4wtp9

Choosing a Tuning Hammer

One of the biggest choices a person must make after deciding to tune a piano is which tuning hammer to use.  There are tons of choices out there between different materials, lengths, head angles, and tip lengths.  Most quality tuning hammers are made of three separate parts: the lever, the head, and the tip.  Many low quality hammers (and some high quality hammers) are only comprised of two or even a single piece.  Some levers are sold with a head and tip included, while others are not.

Whatever you do, DO NOT DO THIS. According to the original poster, this setup "works pretty well." This person has obviously never used a real tuning hammer. Not only will it be nearly impossible to precisely adjust a tuning pin this way, it will al…

Whatever you do, DO NOT DO THIS. According to the original poster, this setup "works pretty well." This person has obviously never used a real tuning hammer. Not only will it be nearly impossible to precisely adjust a tuning pin this way, it will also likely damage the tuning pins.

Materials

There are four different materials that are commonly used for tuning levers: steel, carbon fiber, aluminum, and titanium, with the first two being by far the most popular.  Wood is often used as well, but only to create a comfortable handle, never as a structural element.

steel

Steel tuning levers come in all shapes, sizes, and prices.  Steel is stiffer than titanium but more flexible than aluminum or carbon fiber.  Stiffness is a very desirable quality as a stiffer lever will flex less and give better feedback about whether or not the tuning pin is actually turning.  Look for levers made of tubular steel rather than solid steel rods.  They provide extra stiffness without any extra weight.   Most of the cheapest tuning levers are made of solid steel with a wood handle.  These are often advertised as "student" model levers.  There are many higher-end steel levers available as well.

carbon fiber

Carbon fiber has the benefit of being light and extremely stiff at the same time.  It ranks higher in both categories than any of the other options.  Appropriately, it also ranks at the top of the price chart.

aluminum & titanium

Aluminum and titanium rank 2nd and 4th for stiffness and 2nd and 3rd for weight, respectively.  Titanium is comparable to carbon fiber with respect to price, while aluminum is generally in between carbon fiber and steel.  Both are much less common than steel or carbon fiber.  Aluminum has the potential to create a very stiff, lightweight, and reasonably priced lever.  Titanium is generally a poor choice due to expense and lack of stiffness.

See my review of the KineOptics PTH-5-1 Aluminum Tuning Hammer

Length

An extension lever.

An extension lever.

Theoretically, a long lever is better than a short lever.  This is because most tuning is comprised of making very small rotational adjustments to the tuning pins.  If your goal is to turn a tuning pin by one degree, the end of a 254 mm (10 inch) long lever must move from its starting position by 4.3 mm.  A lever twice as long (20 inches) will only turn the pin about 1/2 a degree if its end is moved 4.3 mm.  Basically, small adjustments are easier with a long lever.

Now, you wont find a 20 inch lever for sale anywhere, because the other thing to consider is how it will fit inside the piano (let alone inside your tool bag).  Most levers are between 10" and 14" long.  Some are marketed as "extension" levers which start out somewhere around 10" but can be extended to provide more torque.  Some extend up to 18"!   Many compact levers under 10" are also available for use in tight quarters in the low bass and high treble.  These are usually only used as a companion to a full sized lever.

The other problem is that length is a double-edged sword.  The longer a lever is, the more flexible it will be.  This is particularly a problem with steel and titanium levers.  Many tuners also report that the mechanism used in extension levers introduces a lot of flexibility.

Tip Length

Tuning tips (the socket that fits over the tuning pin) vary in length between 1" and 3". The tip length that you choose will probably go hand in hand with the head angle that you choose.  This is because these two factors affect how well the lever will clear any obstructions in the piano (plate struts, stretcher, etc.)  A longer tip (usually used with a shallow head angle) will get the lever further from the pin and will give it more clearance.  A shorter tip (steep head angle) will keep the lever close and give less clearance.

Some tuners claim that a short tip gives them more control of the pin as there is less distance between the head and the top of the pin.

Head Angle

In addition to clearance, head angle affects how the force applied to the lever translates to the pin.  This angle is calculated as a positive deviation from 90 degrees to the lever (i.e. a 10 degree head would give a 100 degree angle between the tip and lever).  Available head angles vary from 5 degrees to 20 degrees.  A head of 0 degrees would provide the most efficient transfer of rotational force from the lever to the tuning pin.  As the angle gets larger, more of the rotational force is translated into a bending of the pin.  This can be illustrated by imagining a lever with a head angle close to 90 degrees (the lever and tip are almost in a straight line).  Trying to turn the pin by pushing on this lever would be completely ineffective and result in breaking the tuning pin.

Recent Blog Posts


See more of my blog posts here

Hello There! Don't Leave Just Yet!

I provide piano repair information on my blog and through email correspondence free of charge because I like to help people learn about pianos. However, it does take up a significant amount of my time. So, if you are so inclined, you can click the button below to help supply my caffeine habit and show your appreciation for my work. Thank you!

Buy me a matcha latteBuy me a matcha latte

Or Send Bitcoin! bc1q4tz3qzp6a6zeduqema3v6s0vnrhst4zwy4wtp9

Leveling Keys

Over time, the felt underneath the keys as well as the felt in the action becomes compressed.  Between this settling of the felt and dry rotting of paper and cardboard spacers (not to mention rodent infestations) the keys of many pianos tend to undulate up and down all the way across the length of the keyboard.  This can also be caused by damage to the keytops.  In this case, you will need to recover the keys.

The keys can be re-leveled by carefully adding or subtracting paper spacers underneath the felt punchings.  The tool of choice here is a 4 foot level (or any 4 foot straight-edge).  Make sure that it is true.  One way to do this is by laying on large piece of paper, cardboard, or wood and tracing the bottom edge of the level.  Flip the level over the line so the line is along the top edge of the level.  The line you drew should still match the edge perfectly.  If not, the level is not true and you should find something else to use.

Lay the level across the keys.  It should reach perfectly from the first key to the last.  Crouch down so that the tops of the keys are at eye level.  Generally, the first and last keys receive such little use, that they will already be at the ideal height.  Make sure the level is touching these two keys and not causing them to drop.

By repeatedly lifting and dropping one end of the level, you can find high spots in the keyboard.  Any key that drops from the weight of the level will need to either have paper spacers removed or have a thinner cloth punching installed.  These changes must be made underneath the keys at the balance rail, not at the front rail.

The level resting on the keys

The level resting on the keys

The level slightly lifted at one end.

The level slightly lifted at one end.

To find which keys are low, look for spaces between the tops of the keys and the bottom of the level.  Paper spacers must be added to the balance rail below these keys to bring them up to the level.  I get these spacers from either Schaff Piano Supply or Pianotek.  A general rule of thumb is that the spacers added should be about half the thickness of the gap between the key and level.  Move along the keyboard a leave an appropriately sized stack of spacers on top of each key that needs to be raised.

After you've made it through the whole keyboard, pull the level away.  Go through the keyboard one key at a time, pulling a key up, removing the cloth punching, placing the paper spacers on the pin, and replacing the cloth punching.  Reinstall the key and move onto the next one.  After you've gone through the keyboard place the level again and make a second pass.

After the key is removed

After the key is removed

Cloth punching removed

Cloth punching removed

Paper spacers added and cloth punching about to be replaced.

Paper spacers added and cloth punching about to be replaced.

Recent Blog Posts


See more of my blog posts here

Hello There! Don't Leave Just Yet!

I provide piano repair information on my blog and through email correspondence free of charge because I like to help people learn about pianos. However, it does take up a significant amount of my time. So, if you are so inclined, you can click the button below to help supply my caffeine habit and show your appreciation for my work. Thank you!

Buy me a matcha latteBuy me a matcha latte

Or Send Bitcoin! bc1q4tz3qzp6a6zeduqema3v6s0vnrhst4zwy4wtp9

Recovering Player Piano Reservoirs

This post is a continuation of the Milton Player Piano Series.

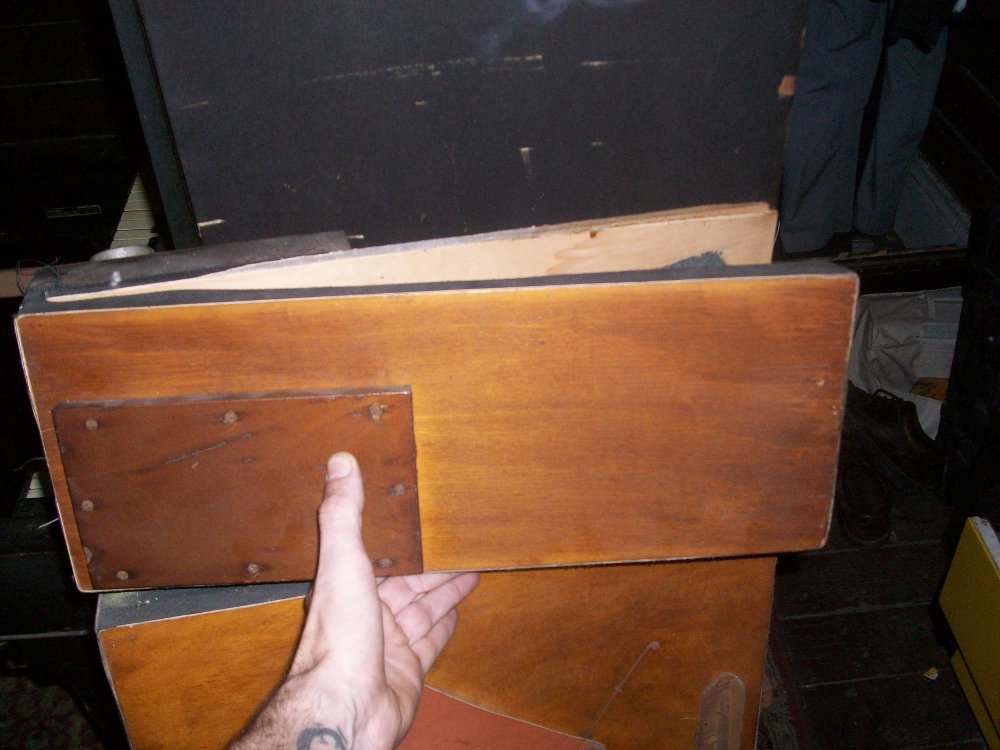
Inside the bottom of a player piano is a system of pedals, pumps, and reservoirs that creates the suction to operate the player mechanism.  The boards that make up one of the reservoirs in my player piano had started to delaminate and the rubberized fabric had pulled away from the board resulting in a serious air leak.  The best way to repair this is to cut and scrape the old fabric off, reglue the wood that delaminated, and recover the reservoir with new fabric.

Before cutting off the old fabric, measure the existing span of the reservoir and write this number down.  When recovering the reservoir later, I want it to end up with the same span as it originally had.

Measuring the original span of the reservoir

Measuring the original span of the reservoir

After writing down the span, cut away as much of the fabric as possible without cutting into the wood.  Be wary while doing this because the reservoirs contain very strong internal springs that can cause damage or injury if not handled carefully.

Excess fabric cut away

Excess fabric cut away

Internal reservoir spring

Internal reservoir spring

Remove the spring by squeezing it together and pulling it out toward the open end of the reservoir.  Once the spring is removed, the cloth hinge can also be cut and the two boards can be seperated.

Closeup of the delamination

Closeup of the delamination

Spread the lamination slightly by using a wedge, shim, screwdriver, etc. in order to make getting glue into the joint a bit easier.  Titebond 2 works just fine for this purpose.  Get enough glue in there to just barely squeeze out when clamped.  Wipe off the excess and allow the glue to dry.

Spreading glue

Spreading glue

Glue drying while clamped

Glue drying while clamped

In order to remove the board that is still mounted to the trunk board, remove the six large screws from the front of the trunk

Six large screws to remove

Six large screws to remove

The second board removed from the trunk

The second board removed from the trunk

After both boards are free, use a sharpened paint scraper to remove the bulk of the rubberized fabric.  Then, clean the edges of the board by lightly planing them with a small block plane.  The goal is to only remove traces of cloth and glue.  Remove as little wood as possible.  Finally, go over all of the board edges with a sanding block with 80 grit paper.

Once the boards are cleaned they are ready to recovered with new rubberized cloth.  I acquire my cloth from Schaff Piano Supply.

This cloth should only be glued with hide glue (preferably hot hide glue) as it allows for an airtight bond while also being reversible for future repairs.  I've made up a small batch of hot hide glue in my glue pot for this repair.

Hot glue pot

Hot glue pot

Hide glue crystals

Hide glue crystals

The first thing to do is to attach a new cloth hinge.  I use pedal webbing (also from Schaff) as the reservoir hinge.

Hinge Material

Hinge Material

The reservoir needs both an internal and an external hinge.  Attach the internal hinge first by applying hot glue to the boards and laying the cloth hinge.  Keep the folded edge of the hinge flush with or slightly inside the edge of the boards.  Use a piece of wax paper to keep from gluing the boards together.  Clamp until the glue is dry.

Clamping the inside hinge

Clamping the inside hinge

Move the clamps to the side edges of the boards and cut another piece of pedal webbing to size for the outside hinge.  Cover the edges of the boards in hot glue.  Do not use too much glue.  If any glue gets on the inside hinge, it will become stiff and won't function as well.

Push the hinge down onto the glue and tip the reservoir up on end, using it's own weight to clamp the new hinge.  After the glue has set, trim it with a new single-edge razor. 

Once both hinges have dried, cut another piece of pedal webbing to the length of the span distance that you measured before.  This piece will be glued across the open end of the reservoir and will work against the internal spring to hold the reservoir at the right span while it is recovered.

Internal spring reinstalled

Internal spring reinstalled

The reservoir can now be recovered.  The most important part of this process is getting a glue seal that spans the full thickness of the board.  You will need to apply glue to the edge of the board, press the board against the cloth, and then pull the cloth back to see if you will have a good seal.  If not, add some more glue, press the board against the cloth, pull the cloth up, and check it again.

When gluing the cloth, it is important to get none of the glue inside of the reservoir.  To accomplish this, apply the glue to the edge of the boards, set them on top of the cloth and use a rocking motion on each board to squeeze the glue to the outside edge.

Glue one side first, then the open end, then the other side, and finally the hinge end.  Make sure you leave enough overlap on the hinge end for a good seal.

I like to trim the open end and the edges before gluing the hinge end.  Using a new single-edge razor blade, run it snugly along the edge of the board while pulling tightly on the loose end of the cut fabric.  You want this cut to be as clean as possible.

Glue applied to the hinge end

Glue applied to the hinge end

Let the glue dry for a day or so and then reinstall using the six large screws that were removed earlier.

Recent Blog Posts


See more of my blog posts here

Hello There! Don't Leave Just Yet!

I provide piano repair information on my blog and through email correspondence free of charge because I like to help people learn about pianos. However, it does take up a significant amount of my time. So, if you are so inclined, you can click the button below to help supply my caffeine habit and show your appreciation for my work. Thank you!

Buy me a matcha latteBuy me a matcha latte

Or Send Bitcoin! bc1q4tz3qzp6a6zeduqema3v6s0vnrhst4zwy4wtp9